- GreenIQ Smart Garden Hub

- GreenIQ Smart Garden Hub - Wandinstallation
- GreenIQ Smart Garden Hub - Unboxing
Smart Home Garten – GreenIQ Smart Garden Hub Review and Installation
In this post I will describe how the GreenIQ Smart Garden Hub works and how to install the GreenIQ Smart Garden Hub. I will also show some images of the the unboxing and what products might be integrated with the GreenIQ, The smart garden hub will lift your automatic irrigation to the next level. It will save you real money.
I have got my Smart Garden Hub from a German company DVS Beregnung.
Smart Home Garten – GreenIQ Smart Garden Hub – Delivery and Unboxing
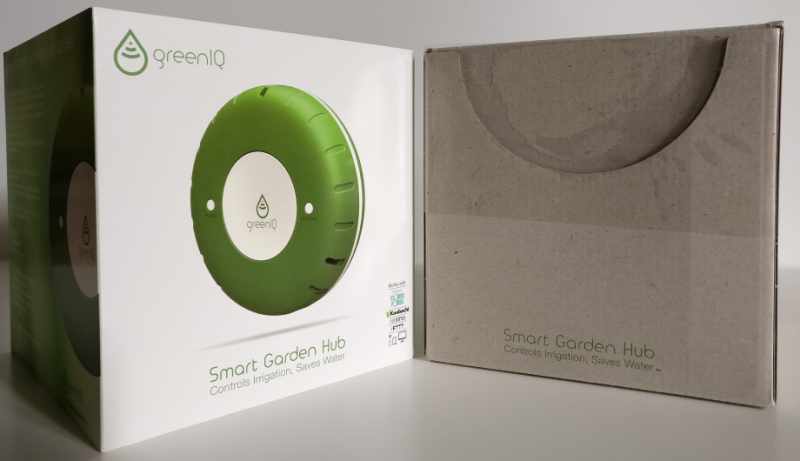
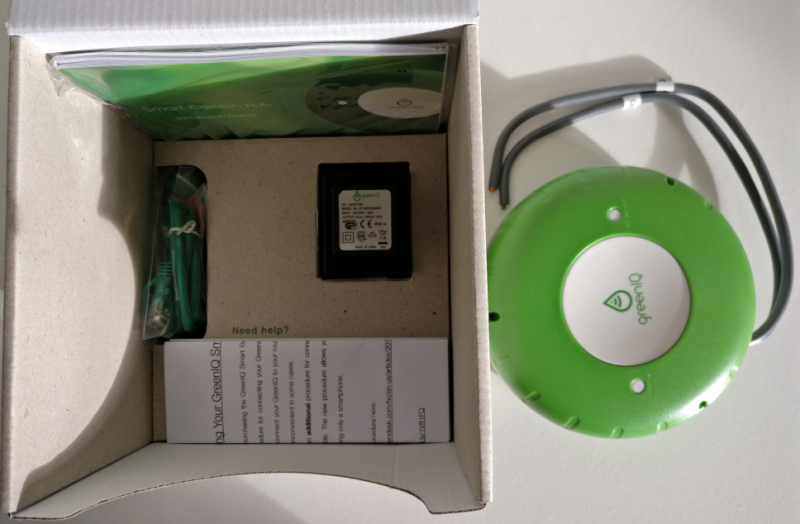
The GreenIQ Smart Garden Hub comes in an squared box. Everything is well packed and easy to access.
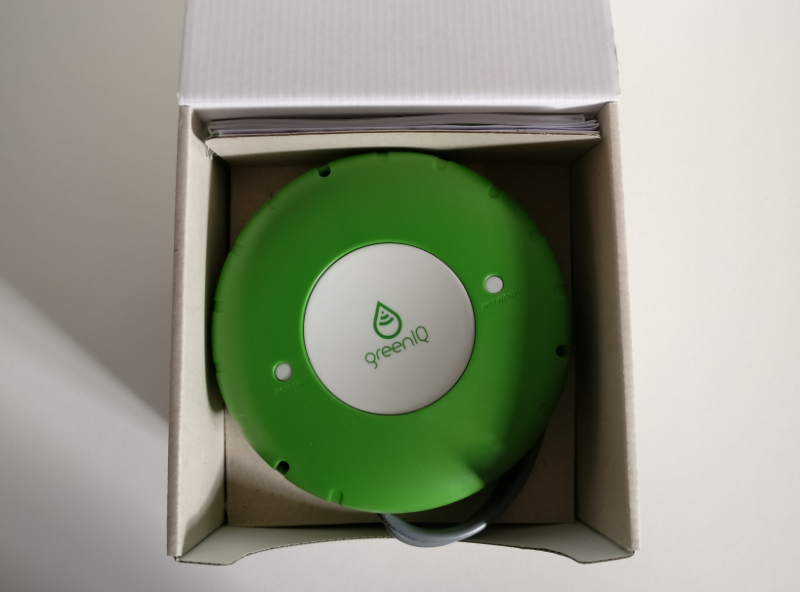
After you have opened the box you will directly see your the Garden Hub.
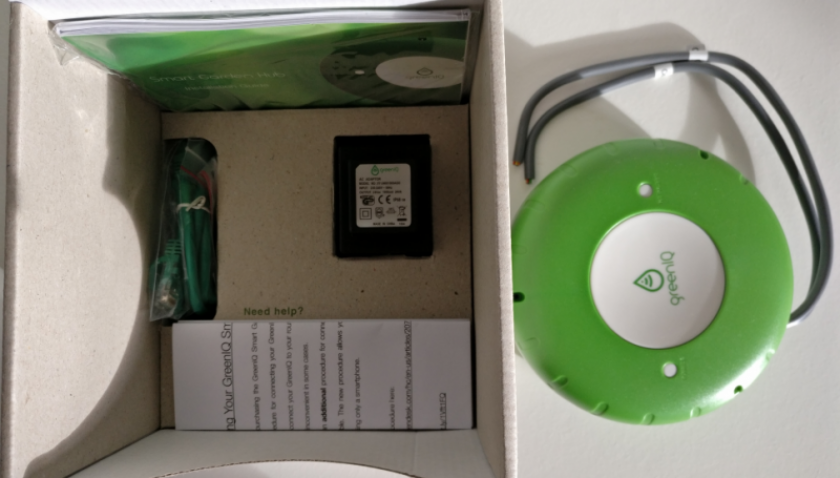
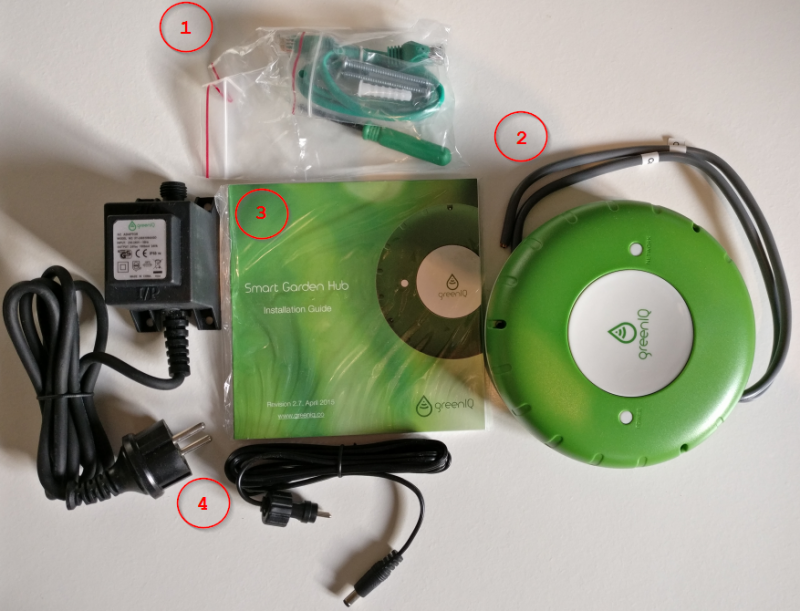
When you lift the GreenIQ you will see the other parts of the delivery.
The box contains
- Assembly Material and a network cable. The cable is short and is only needed for the installation process
- The GreenIQ Smart Garden Hub
- There is a users manual and a installation guide, some labels and a card to access your GreenIQ account.
- Last but not least ther is a 24Vac power supply.
Smart Home Garten – GreenIQ Smart Garden Hub – Functionality
But what does the GreenIQ to make your life a little smarter? To get a real smart garden the Green IQ offers the following to save you money.
GreenIQ Smart Garden Hub – Functionality – Integration of light and valves
- You may add up to 6 valves (24Vac). I am using the following hunter valves.
- You may use another channel for fertilizing, a 24 VAC pump or similar.
- Light can also be controlled.
GreenIQ Smart Garden Hub – Functionality – Integration of sensors
- Control your irrigation depended on local weather stations.
The quantity of water will be automatically reduced to its needs. Depending on the past (cloudy), the actual (rain ) and the forecast (awful hot) the GreenIQ Garden Hub will control the amount of water that is used to keep your garden well irrigated. The following info-graphic shows how it works.
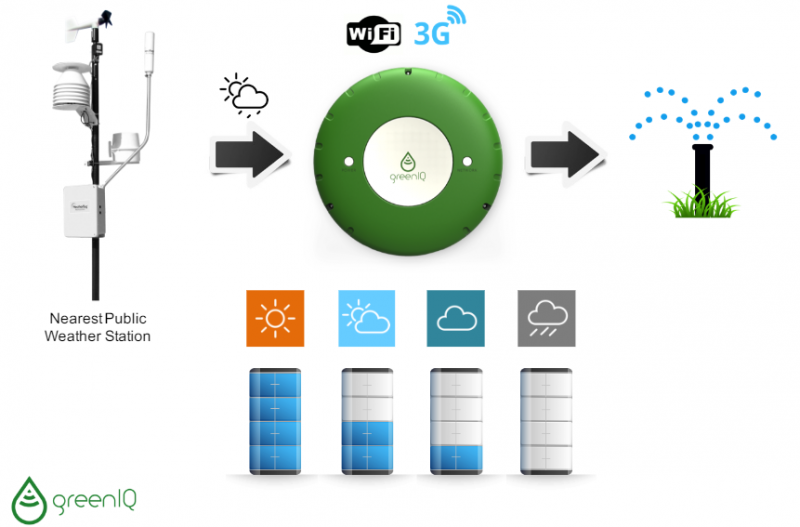
Source: greeniq.co
The system calculates Evapotranspiration (ET).
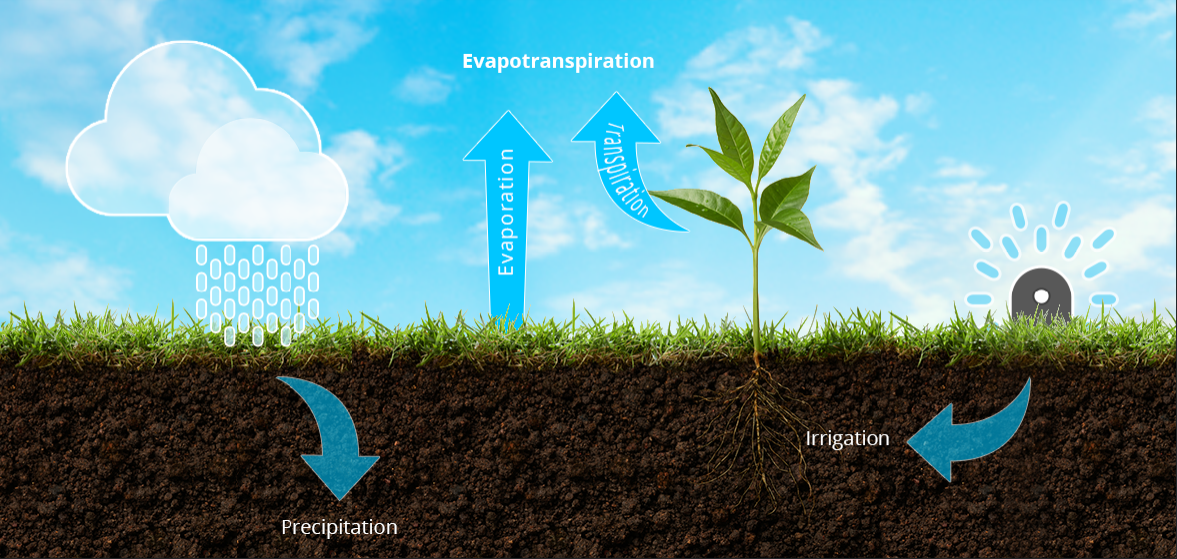
Quelle: greeniq.co
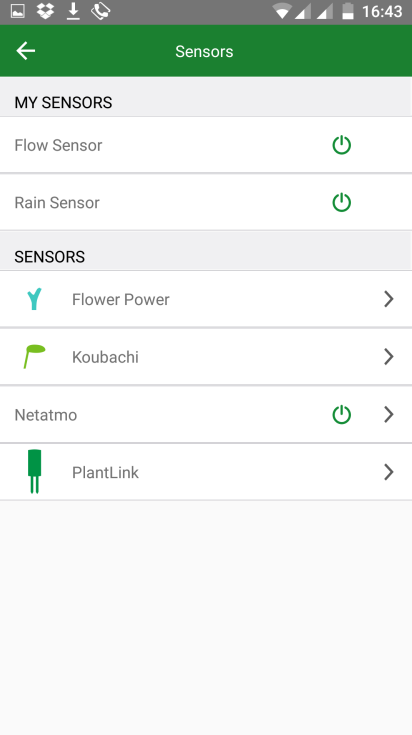
- You may also use local sensors in your garden to optimize it. For example a rainbird senor.
- Also the Netatmo weather station might be integrated.
- You may also use Parrot Flower Power and Koubachi
- There are safety function, that will prevent irrigation under 3° C.
GreenIQ Smart Garden Hub – Functionality – Irrigation Control Modes
The GreenIQ Smart Garden Hub is so flexible! And you are able to control it all with an app (PC/Mac Browser, iPhone orAndroid App). And this is how it works
- Six independent zones
You may control up to six zones. I do it with our raised bed and two separated lawn areas. The valves will open one after another.
- Irrigation duration Steuerung der Bewässerungsdauer
The duration might be controlled. Early morning or in the night. Simply put in start and end time.
- Irrigation Intervals
You may use every day, second day like odd/just weekdays and so on.
- manually controlled
Of course you can simply switch on your zones.
- Still not enough? Than use IFTTT to use your own logic. You will find services of GreenIQ under https://ifttt.com/greeniq
Smart Home Garten – GreenIQ Smart Garden Hub – Installation and Configuration
Now we will start wit the installation and configuration process. The screenshots are German, but you will know what to do. It is really simple.
GreenIQ Smart Garden Hub – Installation and Configuration – Activation of the Cloud
Before you even start, make sure to access your account. Do this step at first!
Simply install the app or use your Mac/PC browser. Call https://greeniq.net/. Allow the app to identify your location. Activate your GPS module.
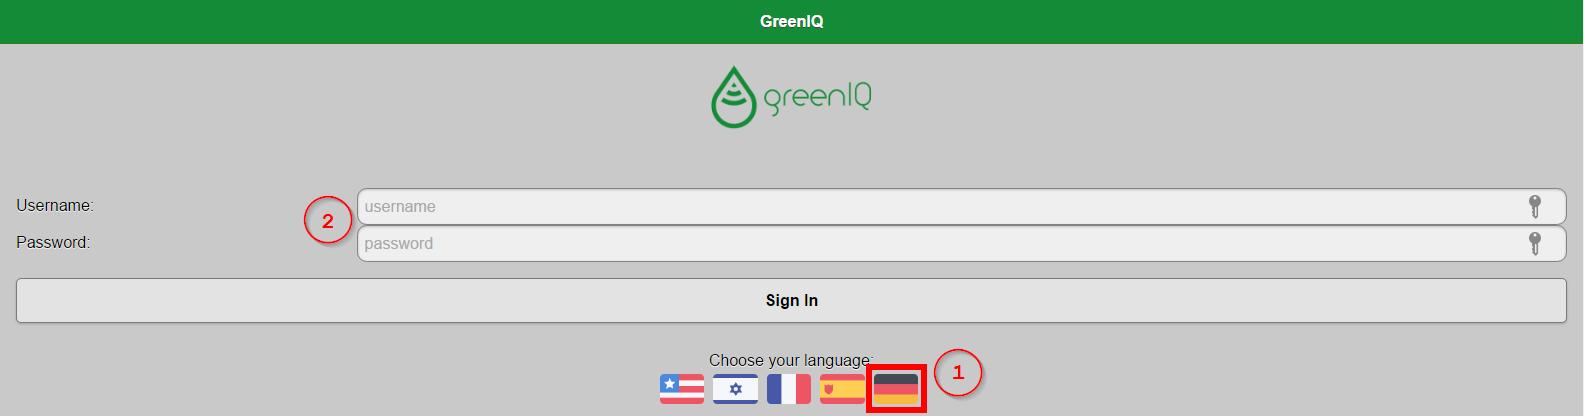
- Choose your desired language
- Put in the a name and password of the card with your access data.
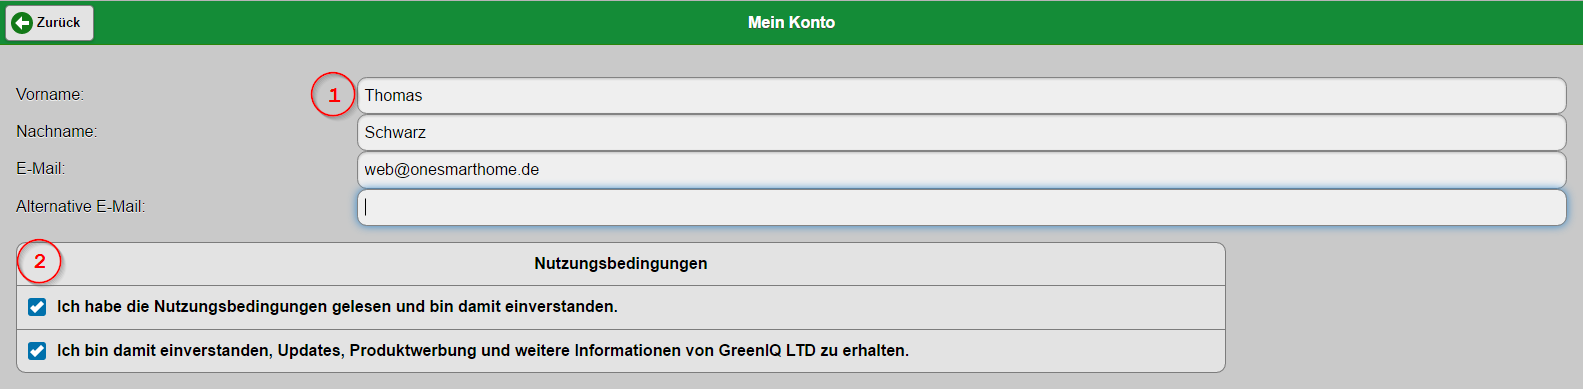
Now you need to put in your Name and eMail. Accept licence agreement and if you would like to receive updates also select the last check box.
Now scroll down a bit. Put in your GPS location data (1a) or simply click (1b) and the app will do it using your GPS module. Allow the access to derive your location. Submit your data (2)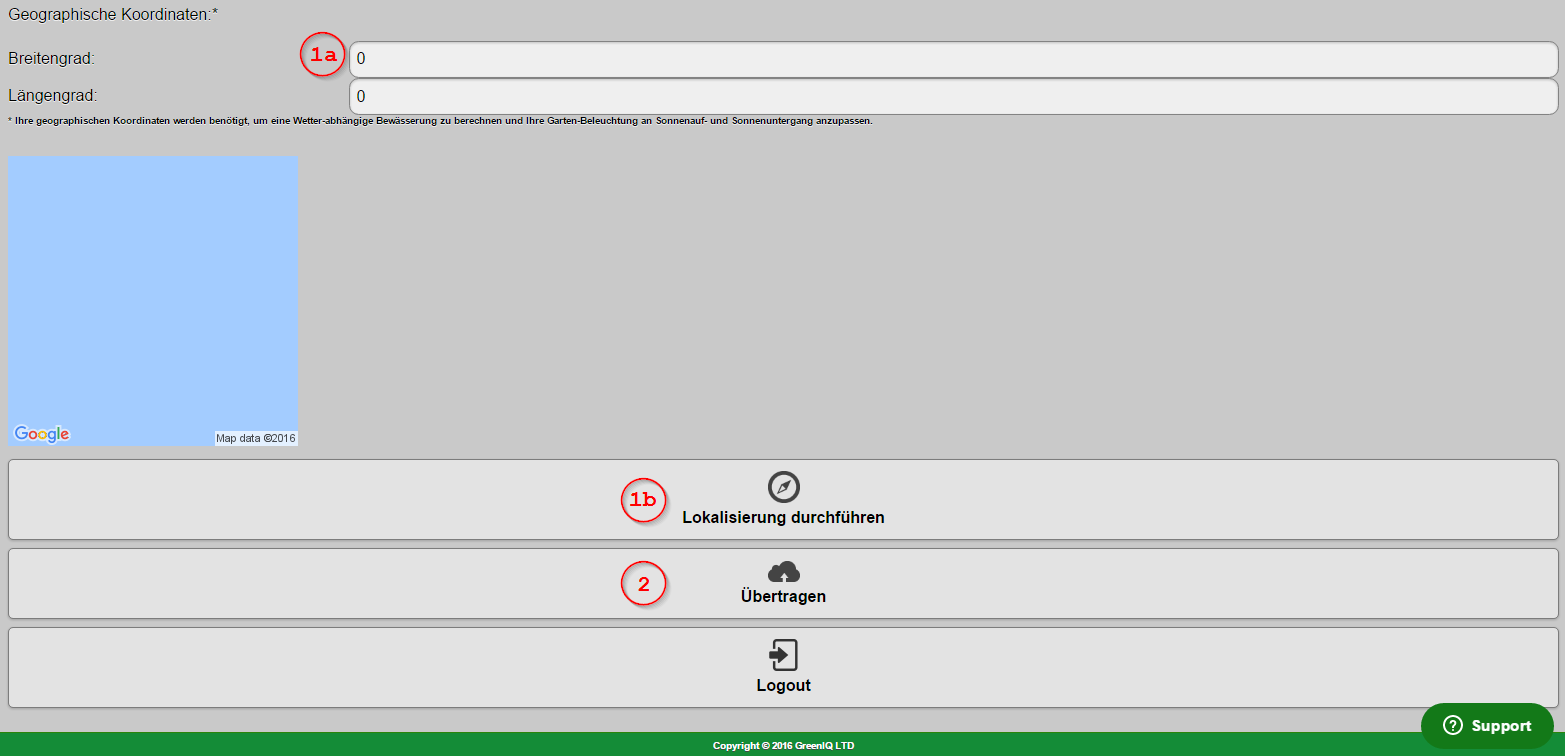
Now your ready to go one step further.
GreenIQ Smart Garden Hub – Installation and Configuration – WiFi
Installation and Configuration – WiFi with hot spot.
Simply follow the Installation via Hotspot. That is easy. Isn’t it?
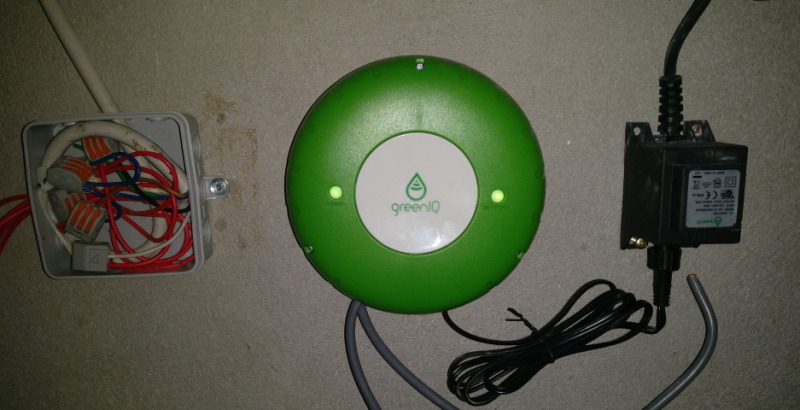
GreenIQ Smart Garden Hub – Installation and Configuration – Assembly
Now you will need to do assembly of the valves and the GreenIQ Smart Garden Hub.
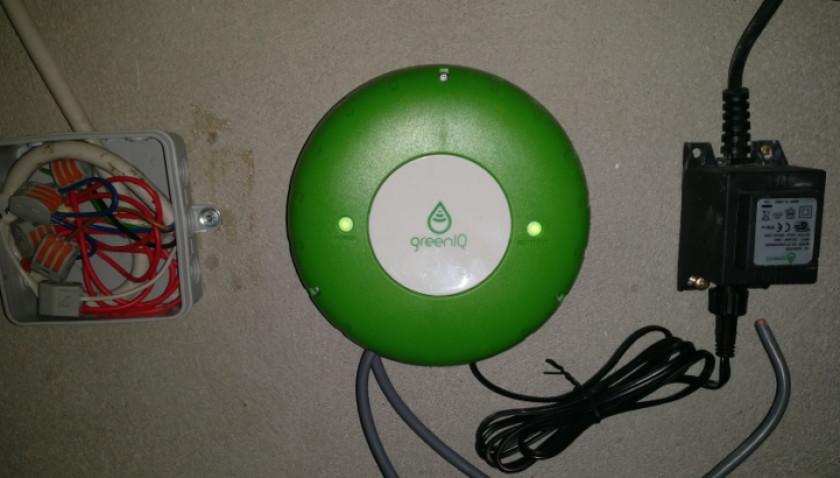
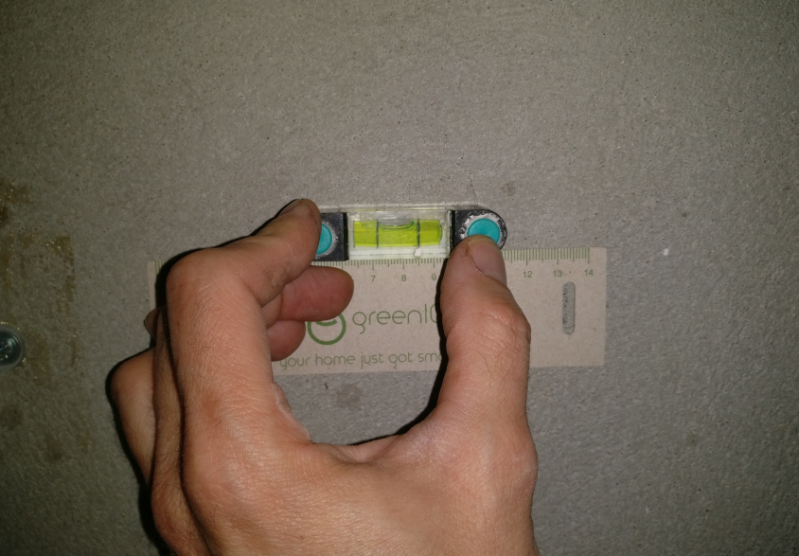
- If you want to have your GreenIQ on a wall like me, use the small paper template. Use a small level and mark the wall with a pencil. Take your drilling machine and…
- Remove the top case of the greenIQ and mount your Garden Hub with the screws and dowels of the delivery. My GreenIQ is near my valves. Otherwise you will have to use longer wires.
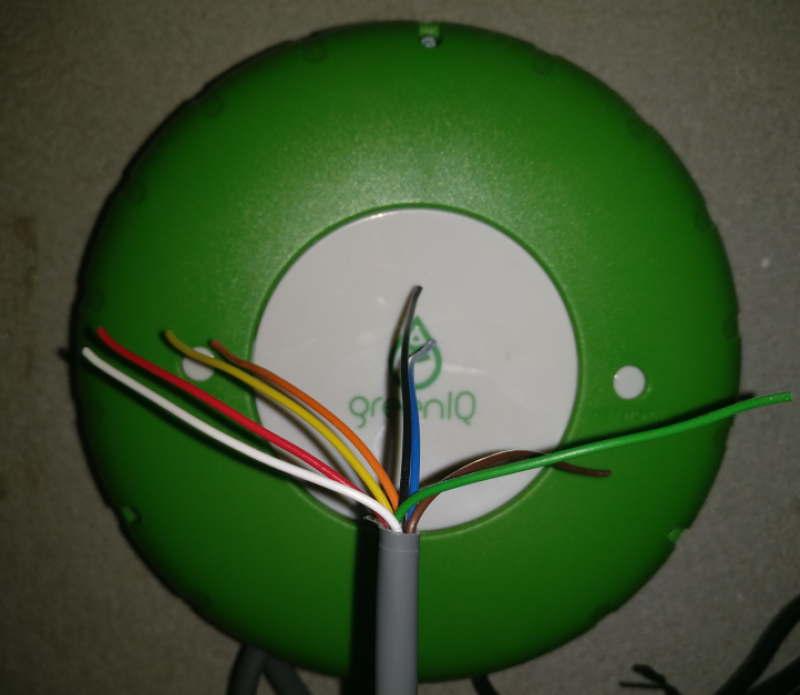
- Now you will have to connect the wires of your valves with your GreenIQ Smart Garden Hub. Remember to use the correct 24VAC valves! For wiring of the valves you will use cable 1. You will find 8 wires. There will be six different colors for the different zones. There is also an orange one for the main valve and a black one (GND).
- After wiring is finished you may test the zones and switch your valves. There is still a wrong table in the installation guide (Revision 2.7, April 2015).
The installation guide will show.
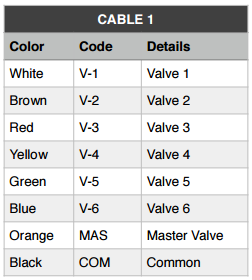
Source: http://greeniq.co/documentation.htm (6th June 2017)
But the app will show.
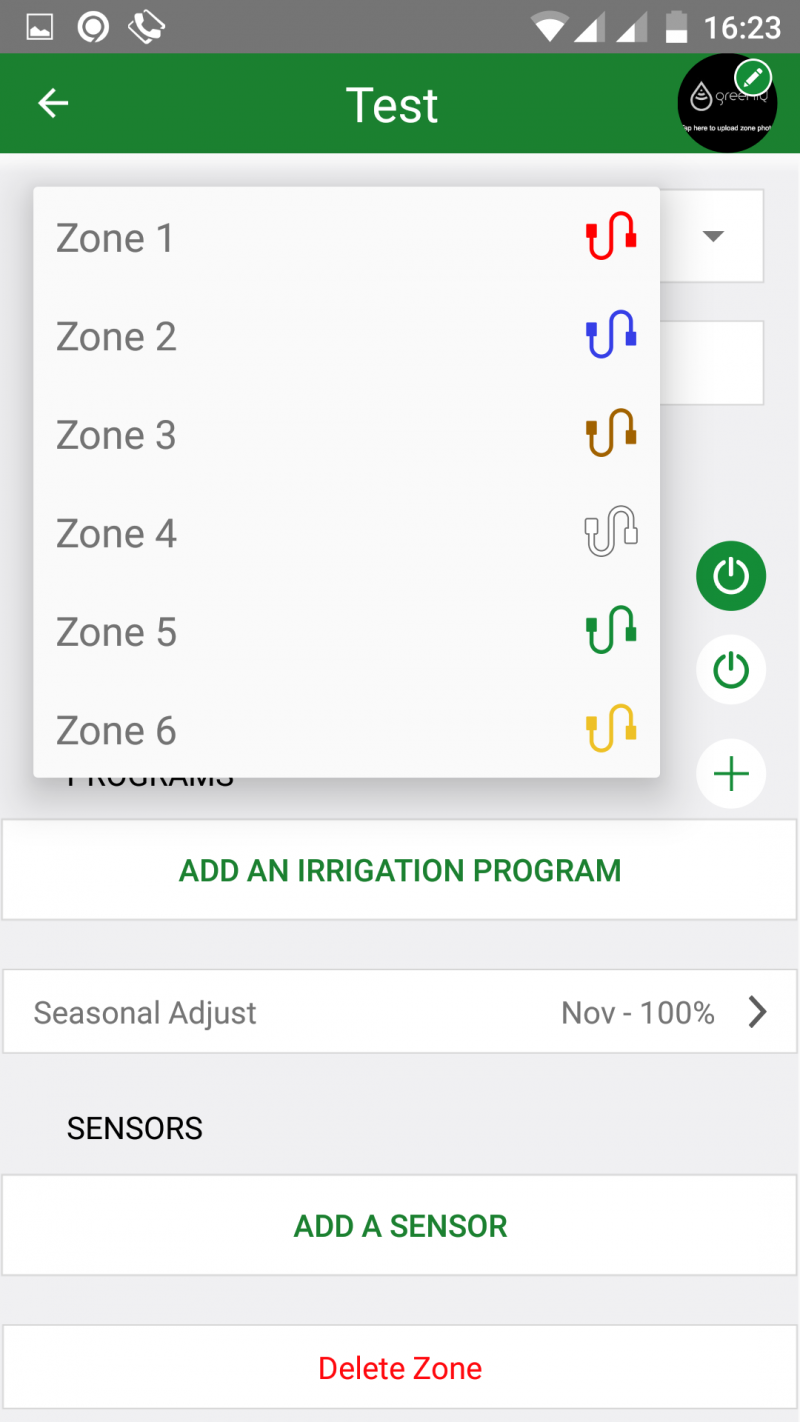
GreenIQ Smart Garden Hub – Installation and Configuration – Create zones
Now I tell you how to use the app to create your zones:
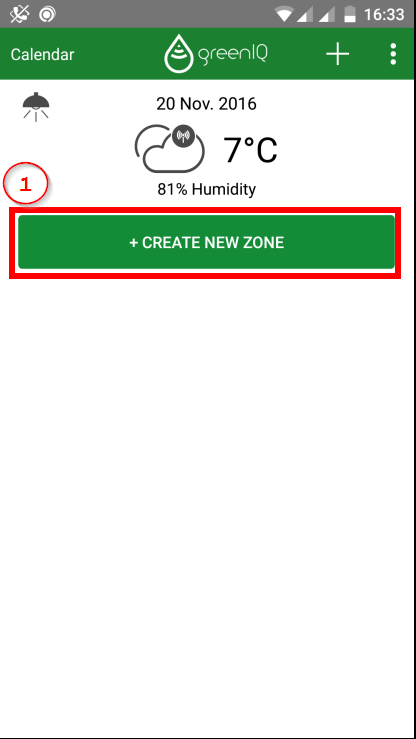
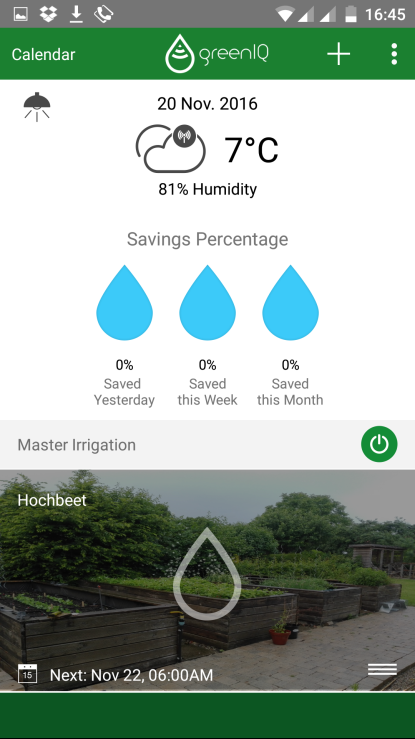
- You will see the weather of your location. You have to click Create “Create New Zone” or the plus on the top.
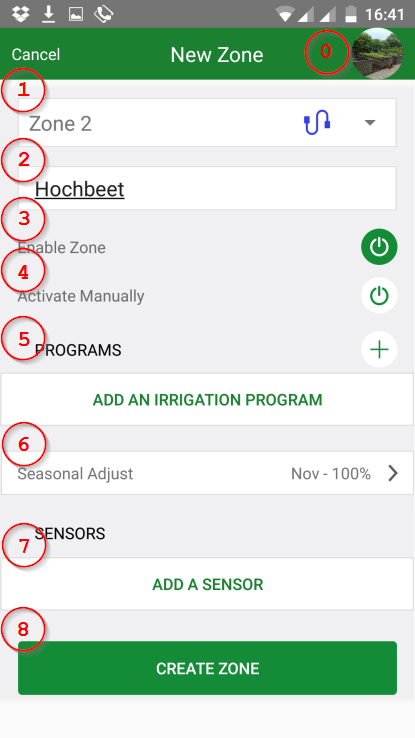
- In the zone you could take a picture (0) of your irrigation zone in the garden. After that you have to choose the zone (cable). Choose a name (2), enable the zone (3). You may test your zone first of all by activating it manually (4). If everything works fine, choose a program. You may use a seasonal adjust or sensors for your zone. If everything is like desired, click Create Zone.
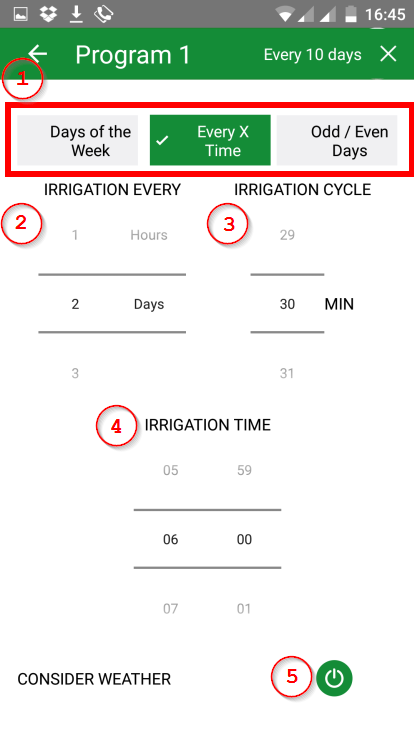
- As already mentioned by adding an irrigration program you may chose every x time (1) and tell to irrigate every x day (2) for y minutes (3) on z o’clock (4). Choose (5) to consider the weather.
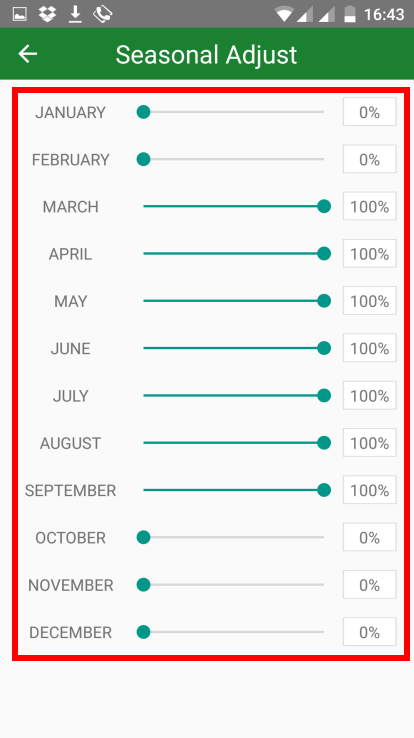
- The seasonal adjust will be used to reduce the irrigation time. In my set up the irrigation time is 30 minutes. So if i set the percentage to 10%, it will water 3 minutes (30 min. x 10%). The seasonal adjust only works if you do not consider the weather (5).
- If you want to use sensors, that is no problem. Click “Add A Sensor” but consider wiring if necessary. You will need the wires of cable 2 of your GreenIQ Smart Garden Hub.
- After you created the zone with the button “Create Zone” you are back in the main screen.
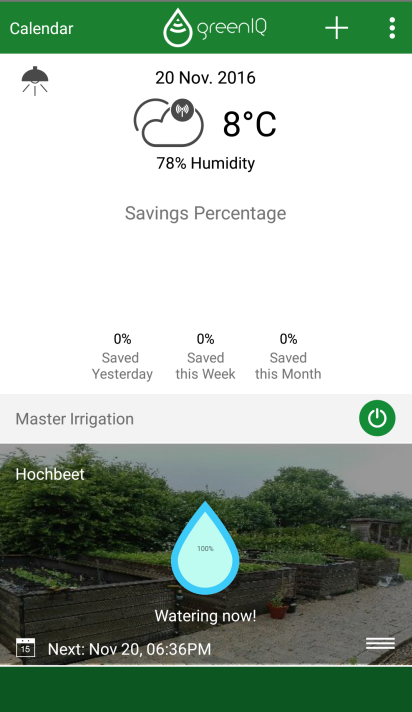
- If a zone is irrigated at the moment you will see the water drop turn blue.
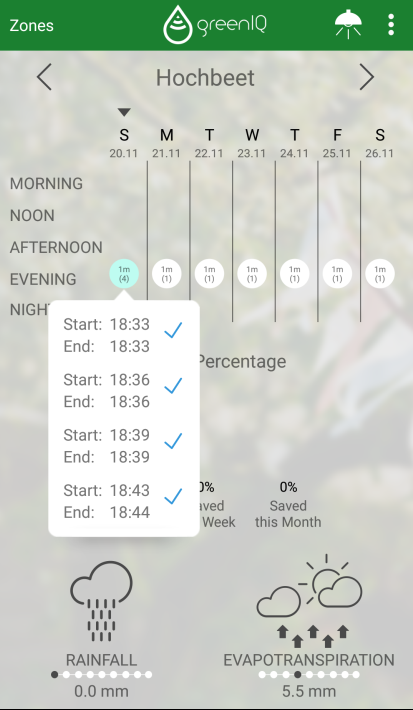
- By clicking the calendar you will have an overview of your irrigation time of the single zones. Here some test runs of my installation.
Smart Home Garten – GreenIQ Smart Garden Hub – Conclusion
I found the installation easy and it was done in a couple of hours. There are still some minor things that could be enhanced, but over all the GreenIQ Smart Garden Hub is a great product and worth the money. And now I am ready for the summer.
