Smart Home – openHAB 2 Z-Wave Integration
This post is all about openHAB 2 Z-Wave Integration. I will explain how to install the Z-Wave Binding and some Z-Wave components to control your Smart Home with openHAB 2. The installation will be done on a Raspberry Pi and we will use the RaZberry2 (ZMEERAZ2) module which supports a great distance (up to 200 meter). Furthermore I will show you how to configure the Z-Wave Binding and integrate a Fibaro Wall Plug (FIBEFGWPF-102) and the dimmable Bulb Domitech ZBulb (DOMEZBULB).
openHAB 2 Z-Wave Integration – Products
If you would like set up your small Smart Home of this post, you will need the following components.
openHAB 2 Z-Wave Integration – Raspberry Pi Installation
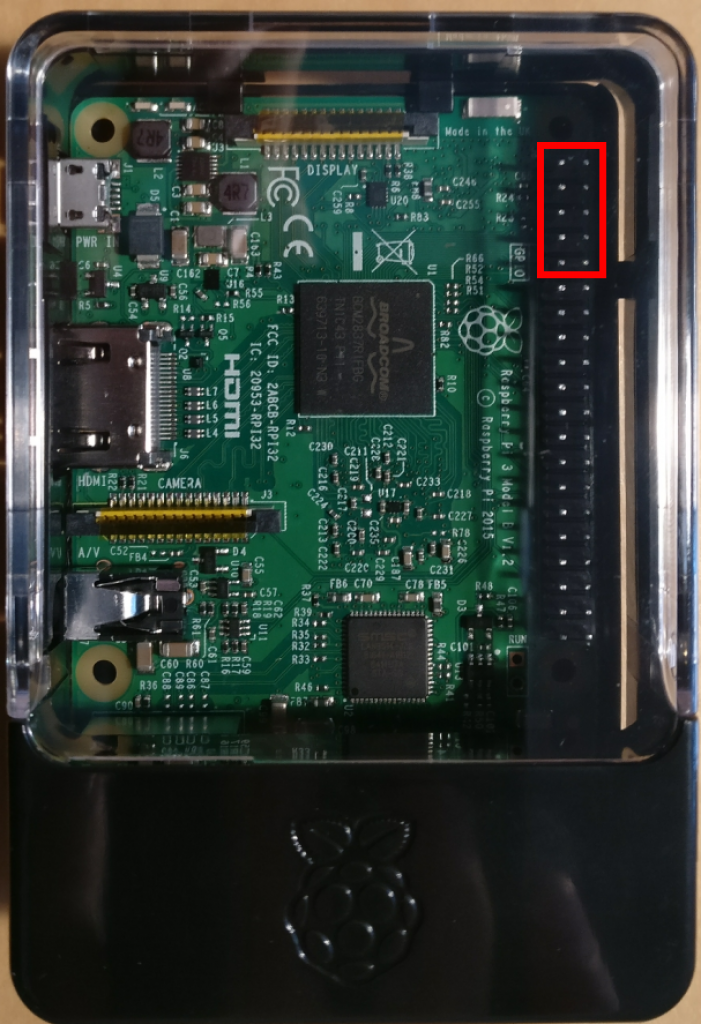
How to build your openHAB 2 Raspberry PI and how to set it up is explained in the post Smart Home openHAB 2 Raspberry Pi Installation. Follow this guide to set up your openHAB 2 Server on the RPi. But please do connect the Razberry2 module, by putting it carefully on the GPIO Pins .
You will connect the Razberry2 module to the mared pins.
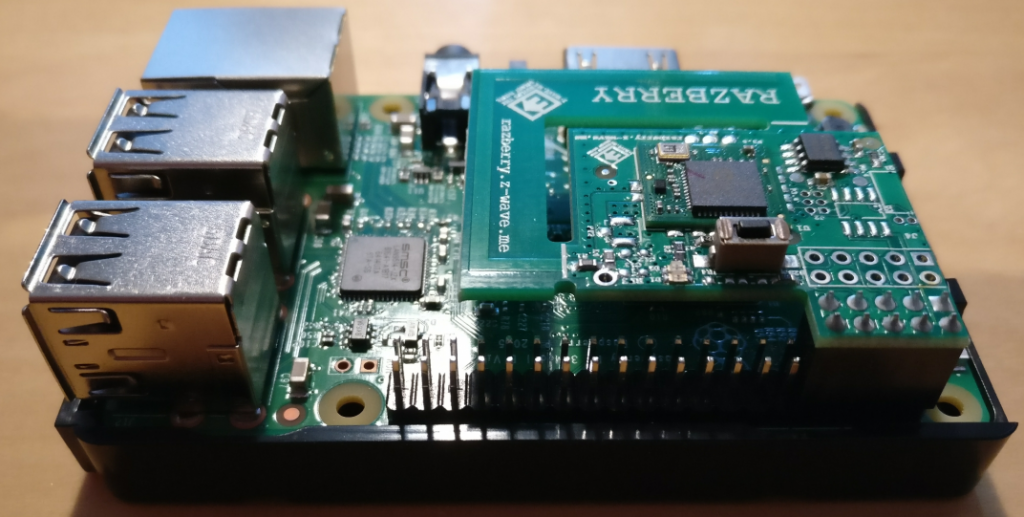
Your Raspberry Pi should look like this.
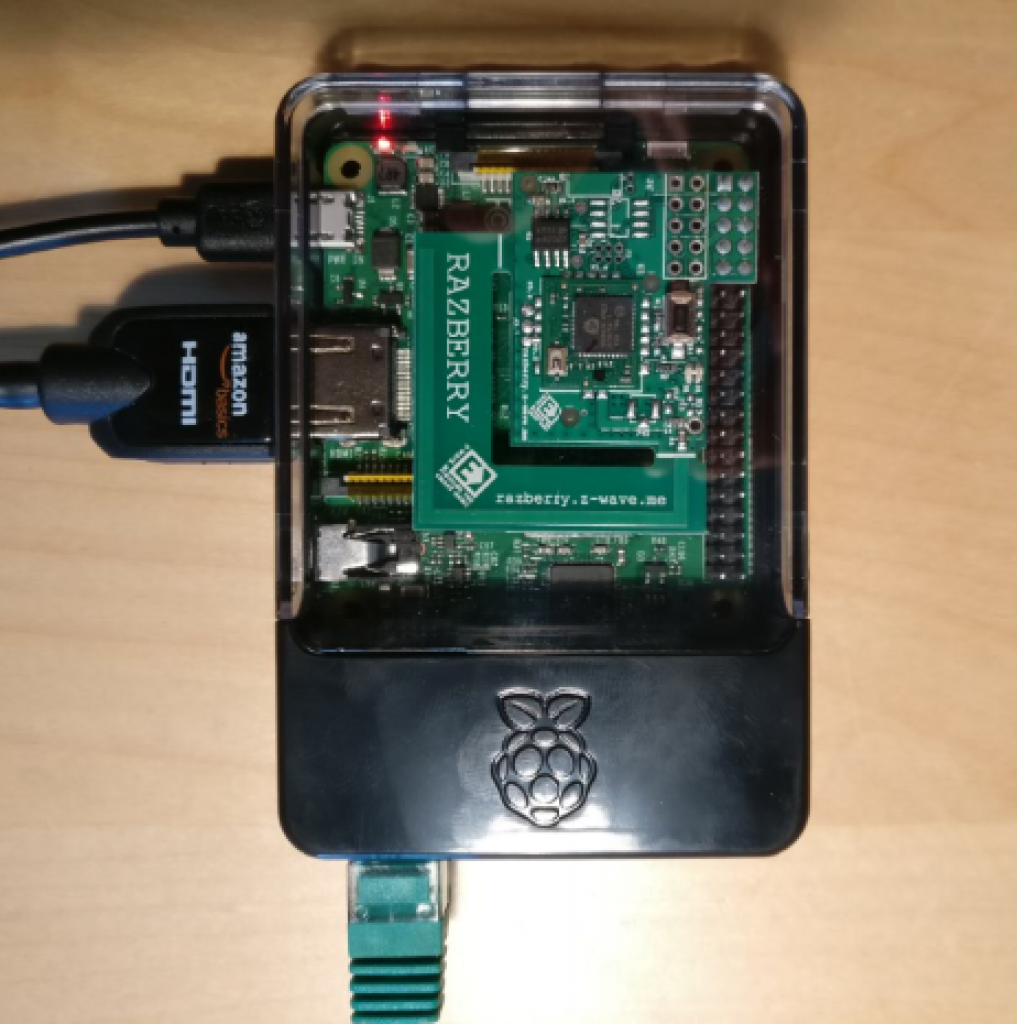
So mount the top case carefully and connect your Raspberry Pi with your home network and the power supply.
openHAB 2 Z-Wave Integration – openHABian Configuration
Now connect to your Raspberry Pi using Putty. This is also explained in the post Smart Home openHAB 2 Raspberry Pi Installation. After logging in, please type the following command.
sudo openhabian-config
You will have to reenter the password. As soon as you see the configration screen chooste the menu item “Serial Port”.
If you are using the Z-Wave Razberry 2 module, set the following parameters:
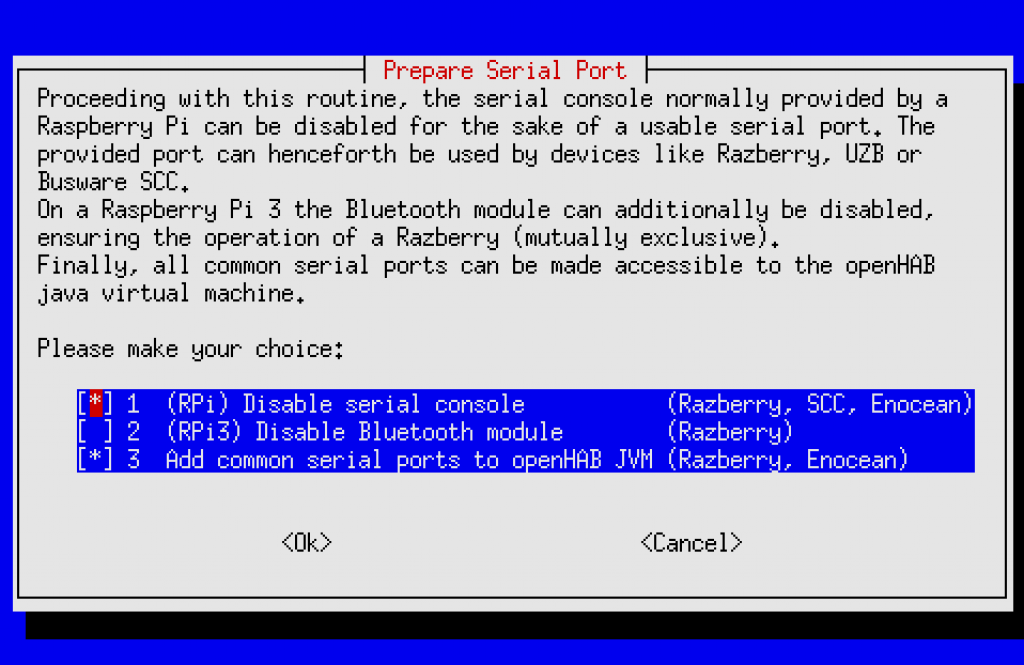
Choose OK and reboot your Pi by typing the following command.
sudo reboot
openHAB 2 Z-Wave Integration – openHAB 2 Z-Wave Binding
Your integration is of Z-Wave components is prepared now. So call the PaperUI by entering the following link in your browser. If your are not using openhabian, please replace openhabianpi by th IP address your Raspberry Pi.
openhabianpi:8080/paperui/index.html#/extensions
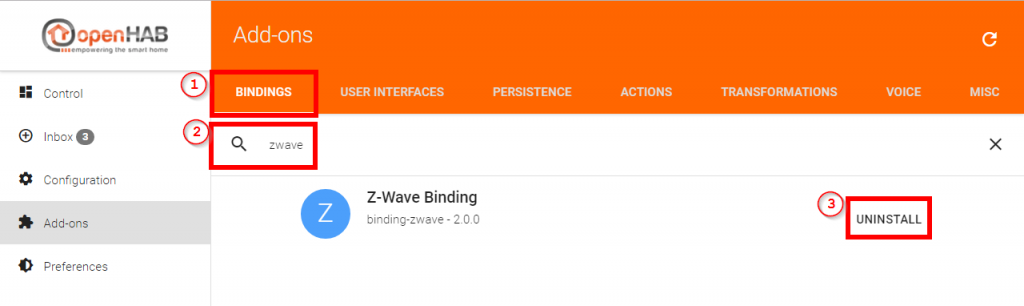
In the tab bindings (1) search for the Z-Wave Binding (2) and click install (3).
openHAB 2 Z-Wave Binding – RaZberry 2 (ZMEERAZ2) configuration
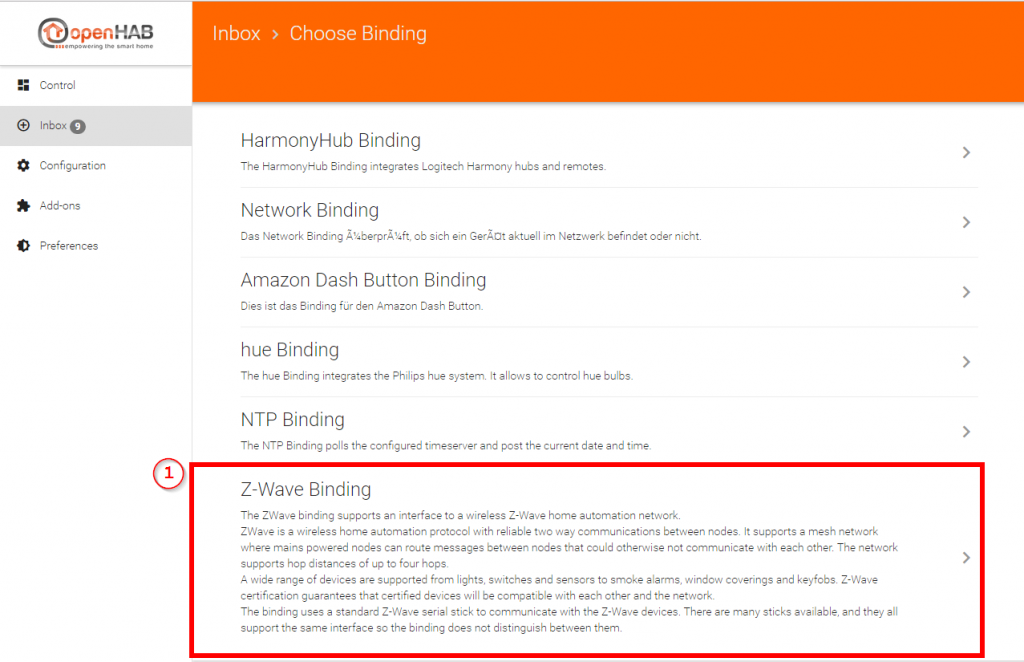
You will have to add your RaZberry 2 (ZMEERAZ2) Z-Wave module manually. Go to the inbox and click the circle with the + sign (1)

Choose the Z-Wave Binding (1) .
In the next step choose Z-Wave Serial Controller (1).
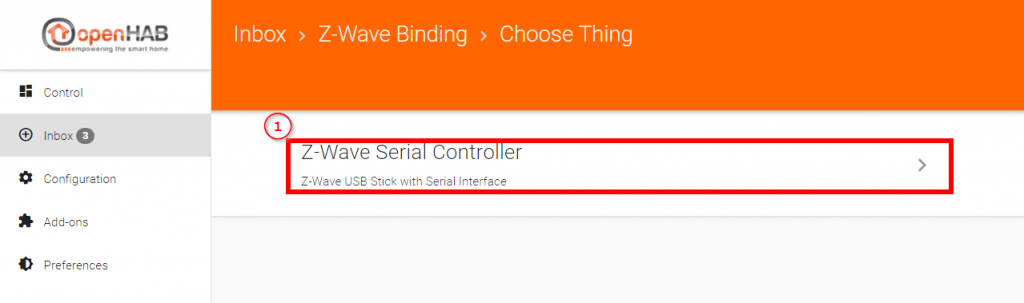
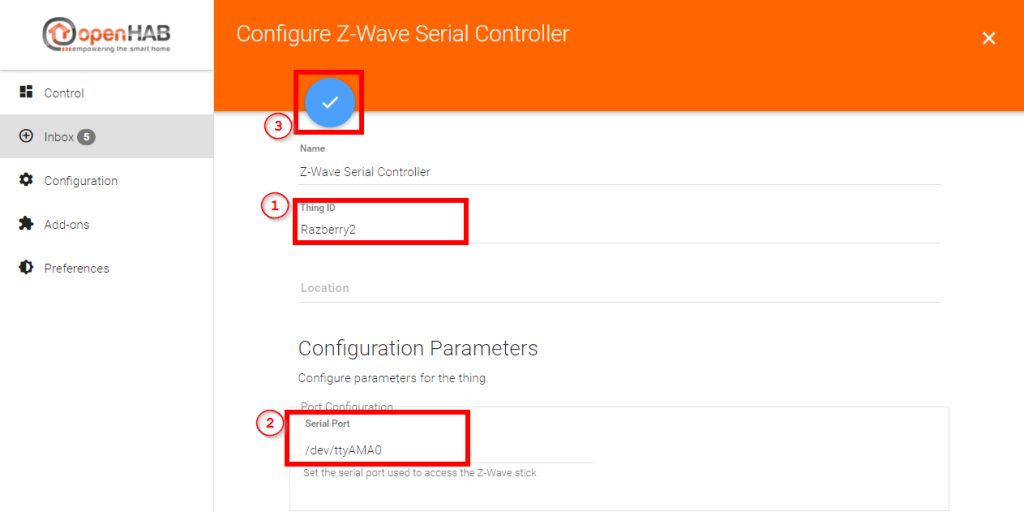
You will be in the parameters of the Razberry 2 module. Give a unique and good to remember ID (1). Put the following value into the field Serial Port (2):
/dev/ttyAMA0
Now check if your your Razberry 2 module is online by calling the following link.
http://openhabianpi:8080/paperui/index.html#/configuration/things
openHAB 2 Z-Wave Binding – Fibaro Wall Plug (FIBEFGWPF-102)
When your Razberry 2 module is online you are ready to for the integration of your Z-Wave components. Put your Fibaro Wall Plug (FIBEFGWPF-102) in a socket near your Raspberry.
Call the following address.
http://openhabianpi:8080/paperui/index.html#/inbox/search
Now choose Z-Wave Binding (1) .
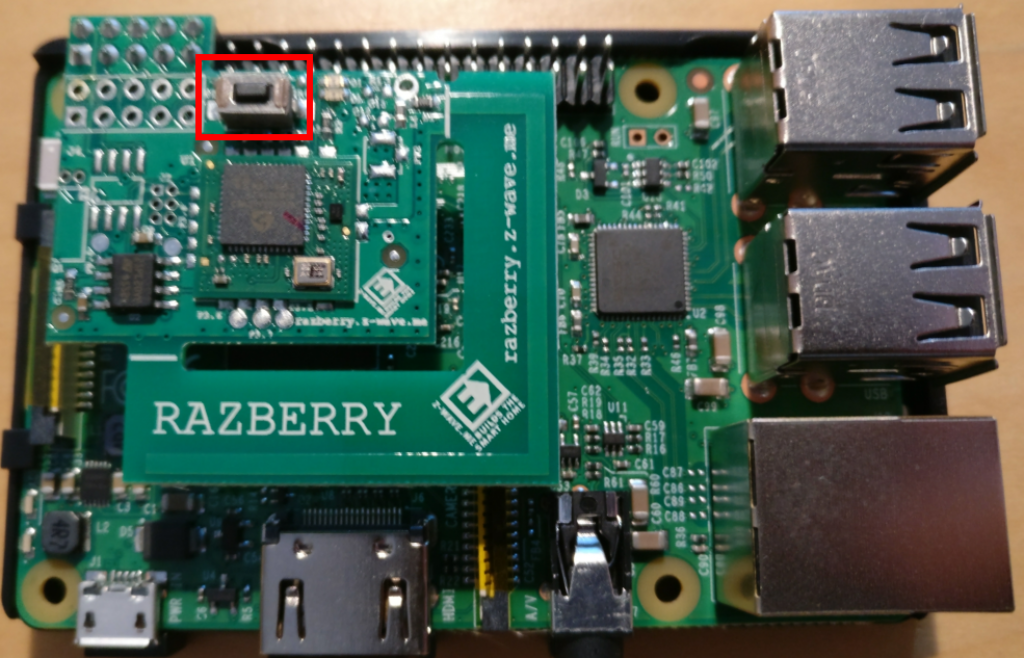
The search will begin. If your Fibaro Wall Plug is not recognized, click the small button on the Wall Plug three times.
Sometimes it is a bit annoying, that the components are not identified correct. For example you can see the Node 6 has been identified and not a Wall Plug. Not good, but as long as it works =)
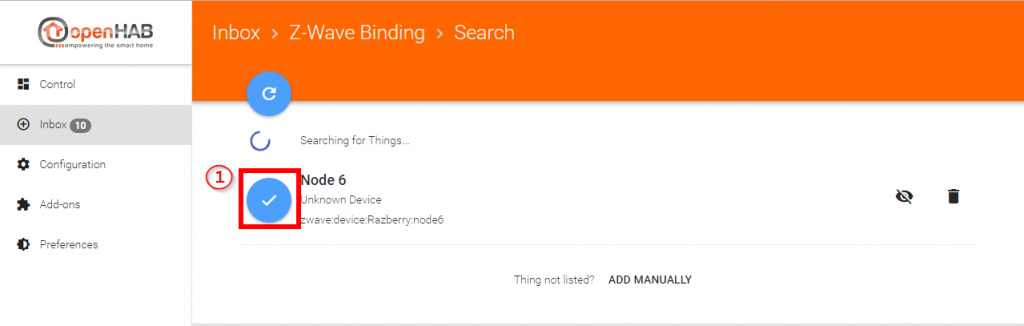
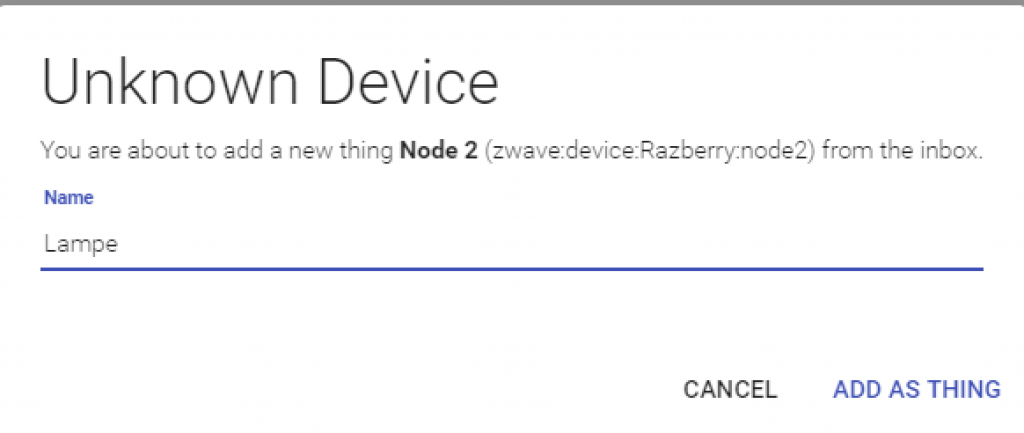
As soon as you click the blue circle (1), you will need to type a name.
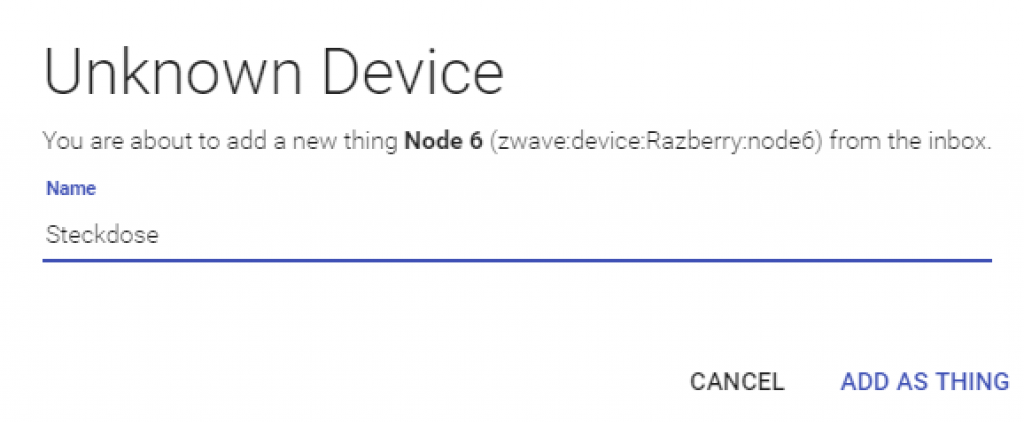
After giving a unique name you will have to link the channels, if you did not activate the Simple Items set up. So call your Things again.
http://openhabianpi:8080/paperui/index.html#/configuration/things
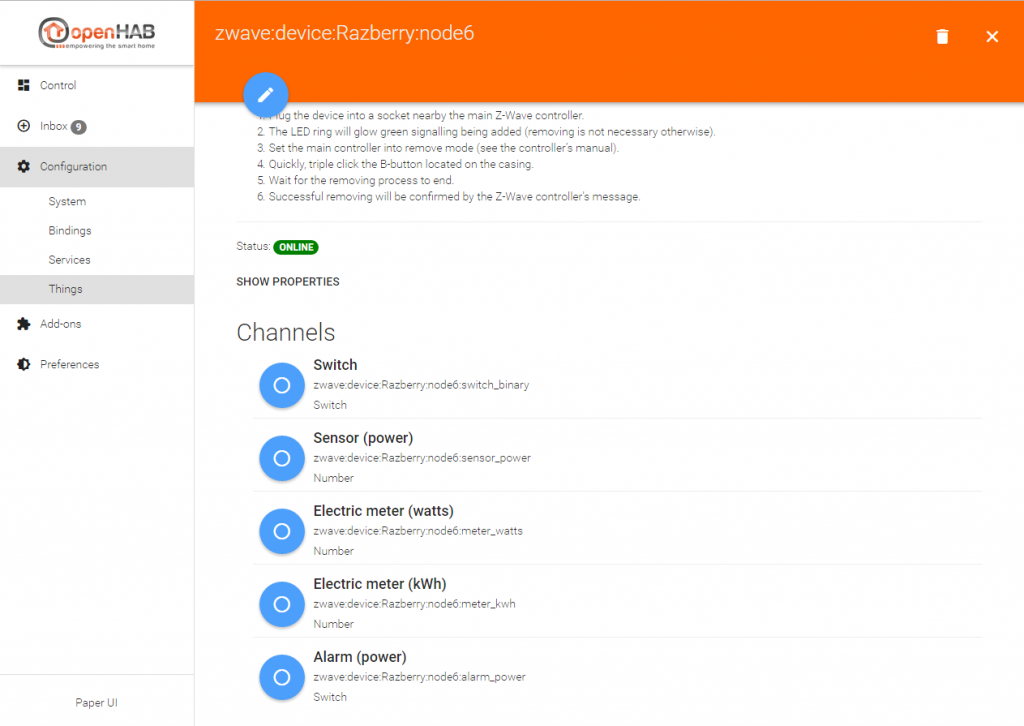
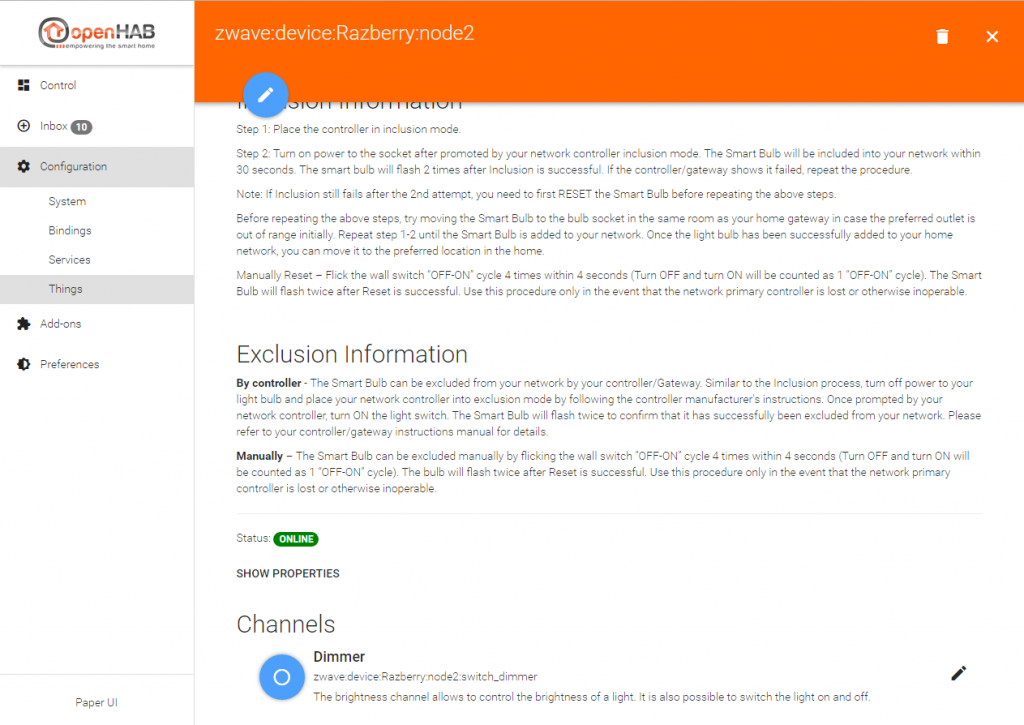
Now you will choose the installed Z-Wave component. You will be able to link the single channels by clicking on the blue circle in front of the channel. If you activated the simple mode, the channels should already been linked.
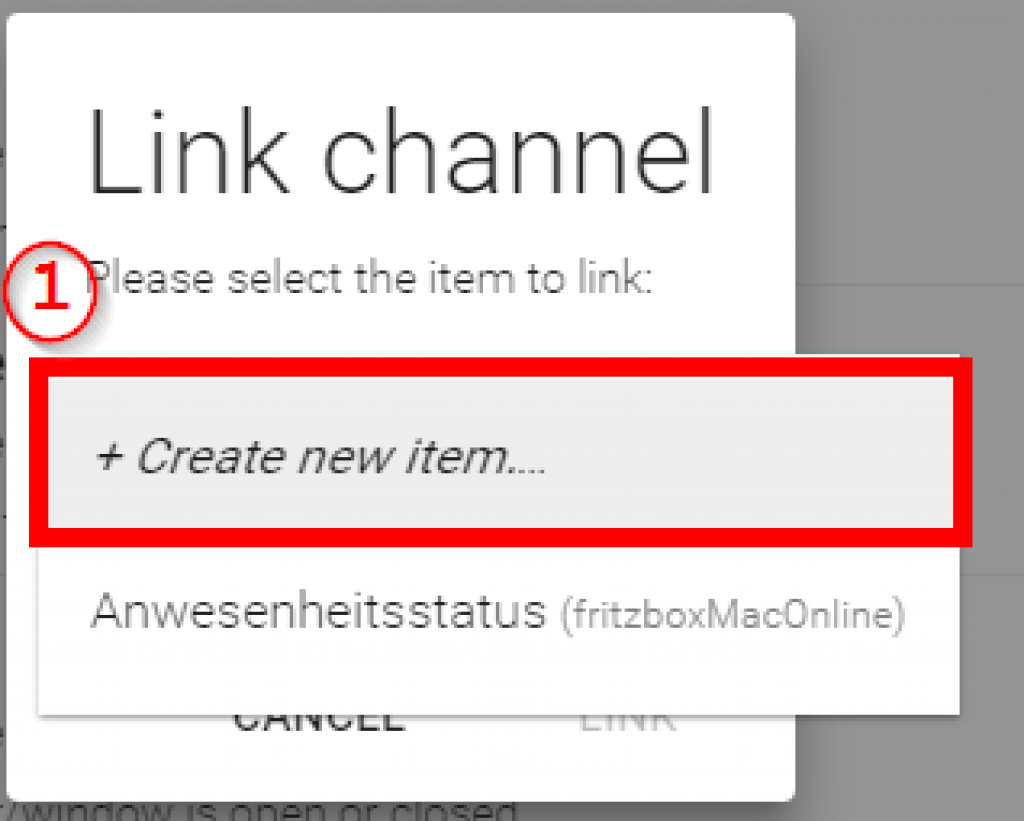
As soon as you click on a channel, you will have to Create new item (1).
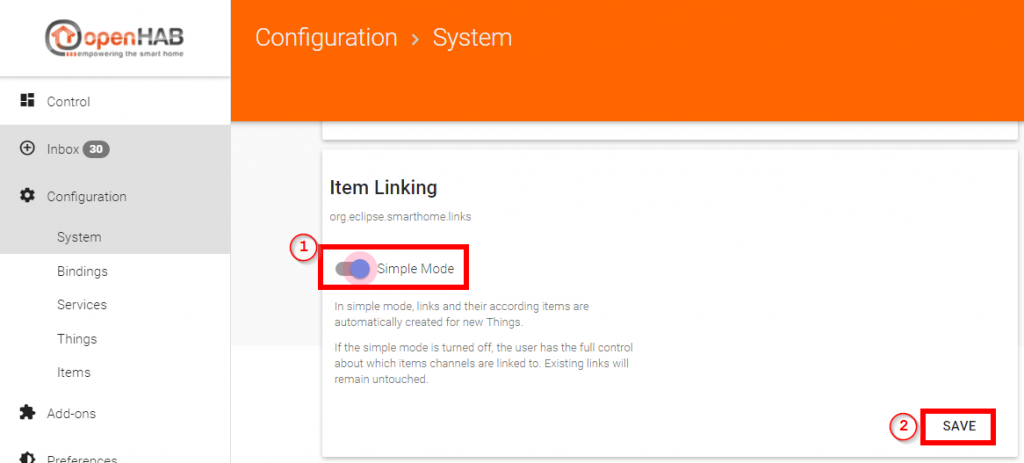
In the next screen put in the needed parameters. For beginners, I recommend activating the Simpe Mode for Item Linking. To do this, call:
http://openhabianpi:8080/paperui/index.html#/configuration/system
Activate Simple Mode (1) and click SAVE (2).
openHAB 2 Z-Wave Binding – Domitech ZBulb (DOMEZBULB)
Now we will integrate the Domitech ZBulb (DOMEZBULB). Switch of the power supply or even better pull the cable out of the socket. Screw in the bulb and follow the steps above to search for new Things.

Give a name.
Activate the channel.
openHAB 2 Z-Wave Binding – Paper UI
As you might have recognized, I did not use any Items or Sitemap configuration this time. Because you are already able to control it by using the control function of the PaperUI
In the following image you will see the channels of the lamp (1) and the Razberry 2 module.
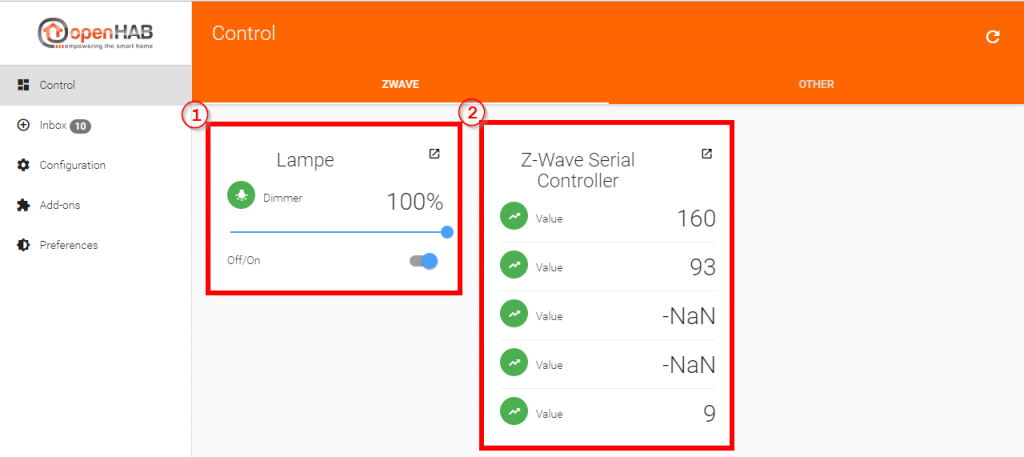
So it does work without a sitemap. But I will use my existing sitemaps, because I have so much more options to configure the layout.