Smart Home – openHAB 2 Synology DiskStation Installation
This post is about how to install openHAB 2 on a Synology Diskstation installation. This guide will tell you which kind of Hardware to choose and which steps have to be done in DSM.
If you prefer a video, here we go.
openHAB 2 Synology DiskStation – Hardware
The basic requirement is for the Synology Diskstation to support Java. Not all CPU are capable of this. If you plan to install openhab 2 on a Synology DiskStation, you need to keep an eye on the requirements. You can cut your search short and use one of the following diskstations. They are perfectly sufficient for private use.
The DiskStation doesn’t have a hard drive, yet. From my experience with Seagate I recommend the special Westen Digital Red series. They will give you a 3 year warranty. If you’d like to have 5 years, get the Pro series.
openHAB 2 Synology DiskStation – Configuration
openHAB 2 Synology DiskStation – install Java
Open the package center (1).
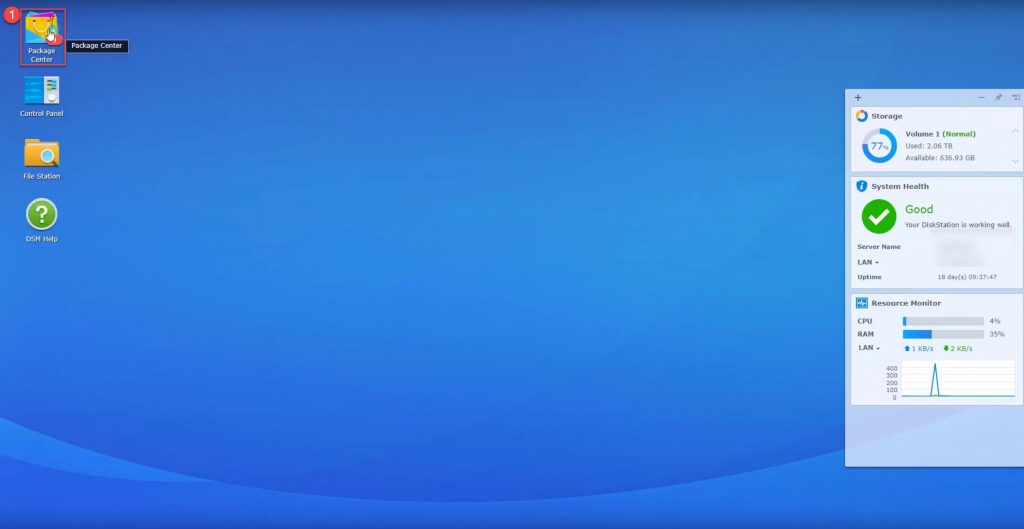
Search for Java (1).
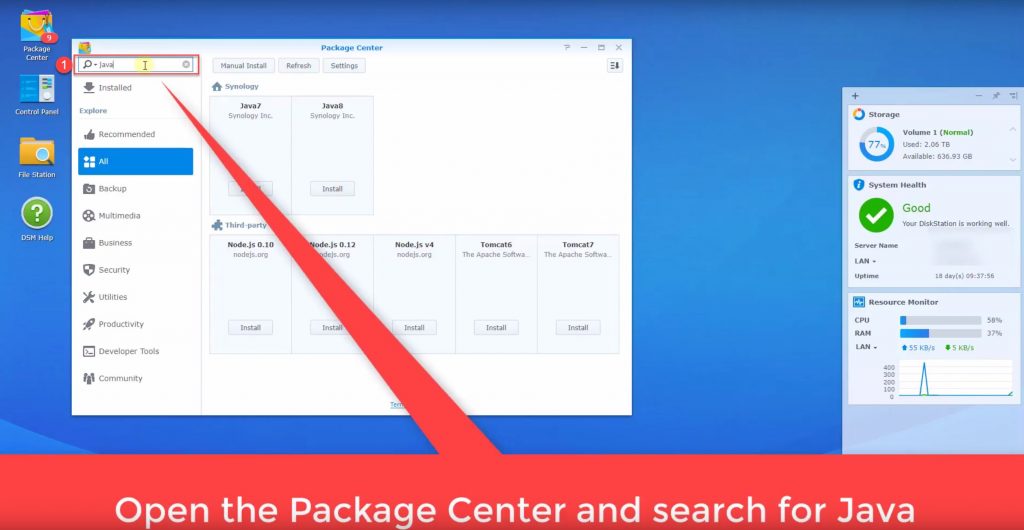
Now choose Java8 and install.
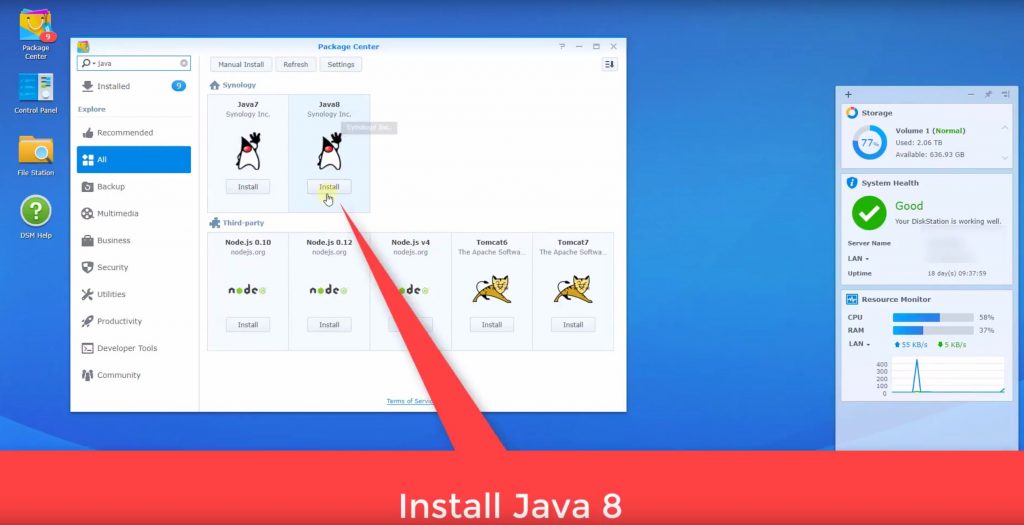
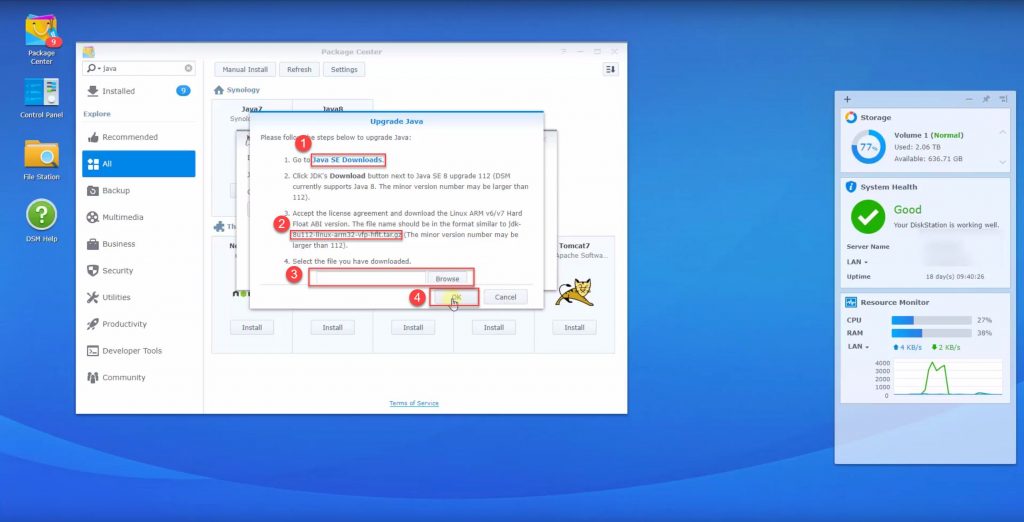
Now you might update Java (1).
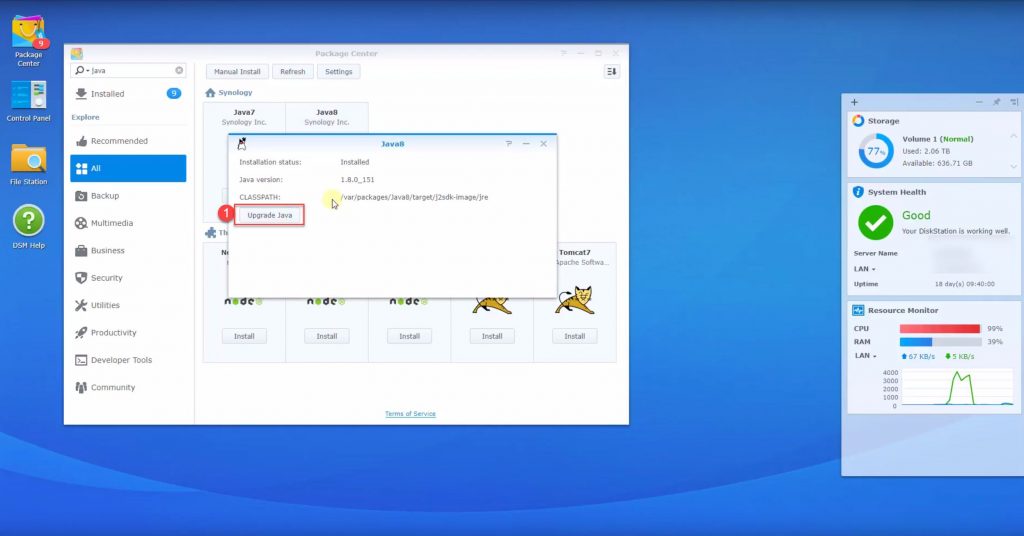
Follow each step after selecting JAVA SE Download (1). Download the relevant file with the name given (2). It might be necessary to log into Oracle. Choose the file (3) and click OK (4).
Java is now up to date and we can move on.
openHAB 2 Synology DiskStation – Activate User Home Service
It is necessary to activate the user home service for the installation of openHAB 2 to work. At first, I had tried to install openHAB2 without the service and it didn’t work.
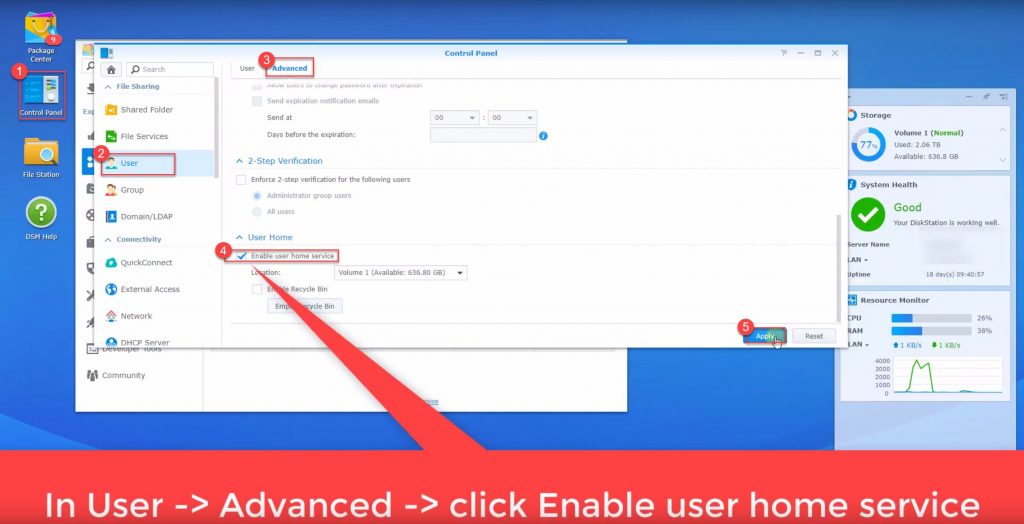
Select the control panel (1), then choose user (2) and extended (3). Check the box for activating the user home service (4). Finally, click on confirm (5).
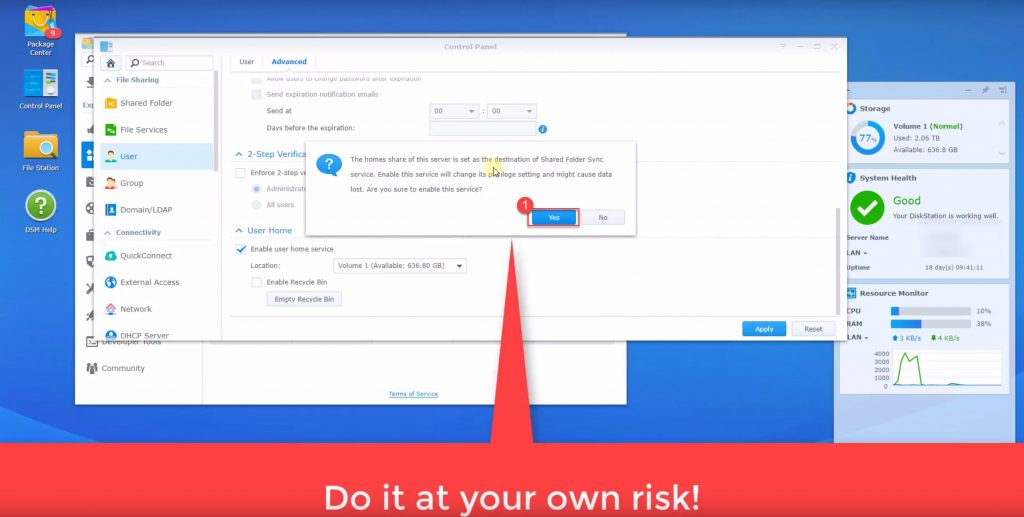
Please confirm the following window at your own risk.
openHAB 2 Synology DiskStation – Install openHAB 2
Now we finally get to do the real installation of openHAB 2. For this, the following steps are necessary. First, download the latest OpenHAB2 Synology Package , because a few important corrections have already been made to it.
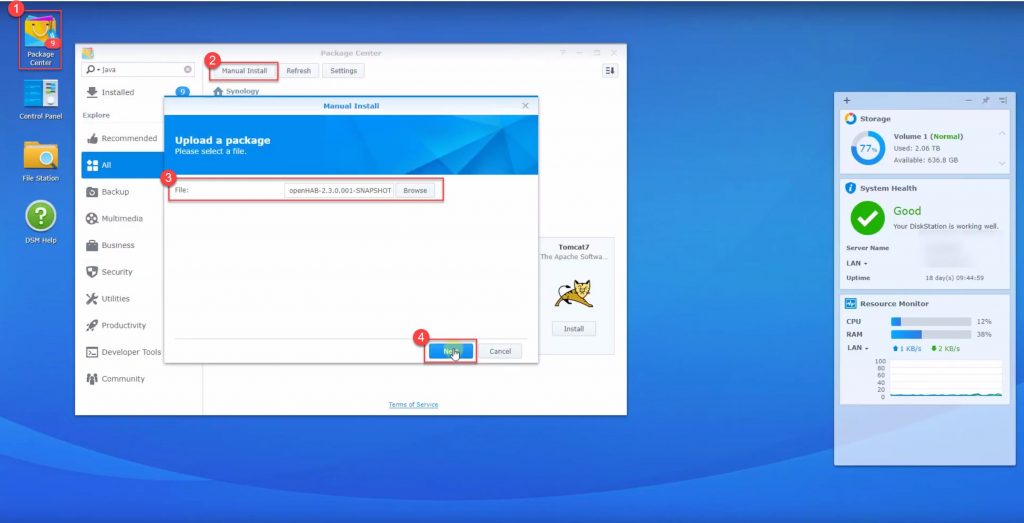
Call up the package center again (1). Now click “manual installation” (2). Choose the file you downloaded earlier (3) and click continue (4).
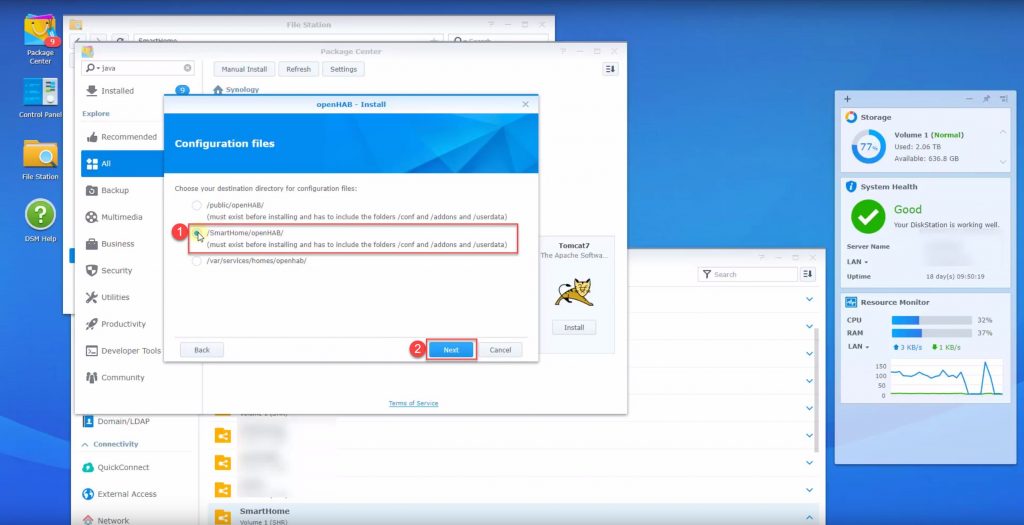
In the next screen choose the folder in which you want to save the openHAB 2 files. I choose the second option (1) and confirm (2).
Make sure to provide a shared folder ‘SmartHome’ using system control. After that, use the file manager to create the folder openHAB2 within the public folder. In the Folder “SmartHome” folder, you now create the folders “openHAB”. Watch your spelling!
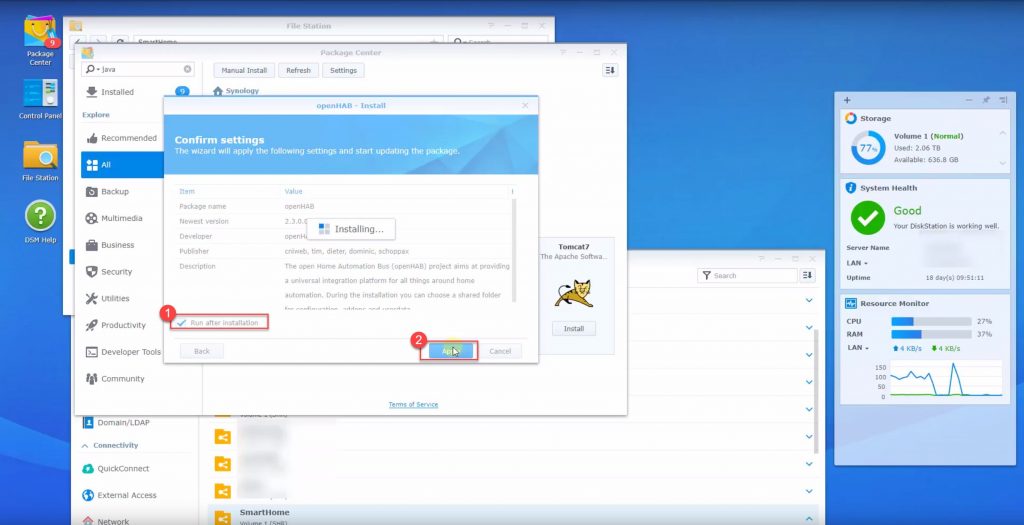
Go through the next steps as License, Port and so on by yourself. At some point you will see the following screen. Check “Run after Installaton” (1) and Apply (2)
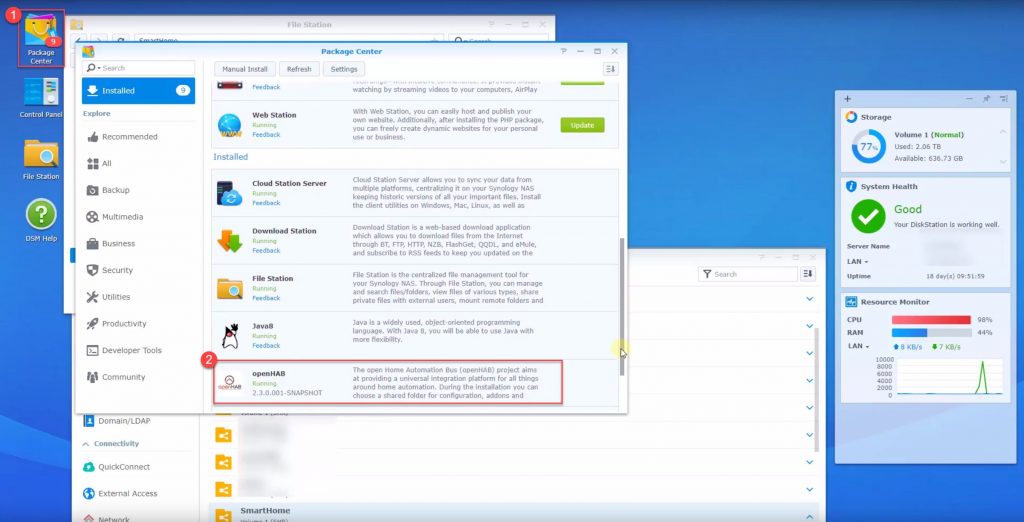
Now the openHAB package is installed on the Synology DiskStation (1). Now choose the package (2).
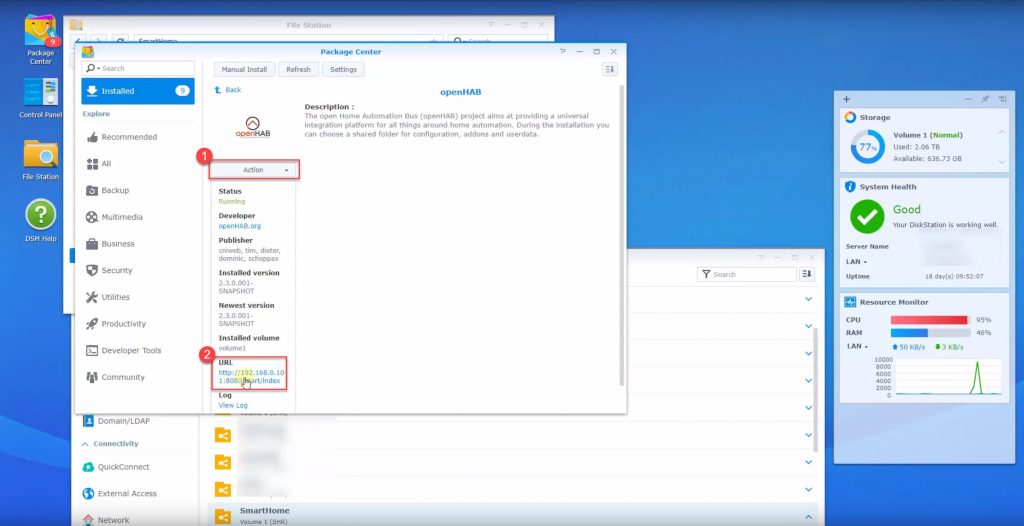
You have now the option to close and restart openHAB 2 (1). It makes sense to do this once in a while. =) This is also where you will find the link to start openHAB 2 (2). After installation, please take the time to read the post openHAB Configuration or enroll in my openHAB 2 Training here or on Udemy.
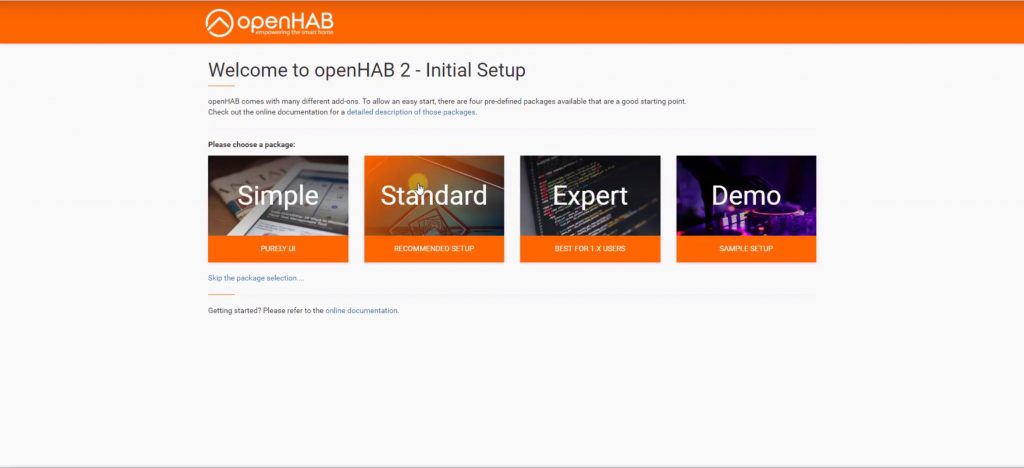
Give openHAB some time to start and you will see the initial start screen of openHAB 2.
And that was it. You will see in the video that this doesn’t take longer than ten minutes (including downloads and explanations).


