openHAB 2 Push Notifications – Installing Telegram within openHAB 2
This post will give you a step by step explanation of how to use openHAB 2 push notifications via Telegram. Telegram is just one of many options. If you’re already using Prowl or Pushover, the necessary bindings are also available. I use this option because Telegram offers the largest variety of applications for devices and system software. There are not only apps for Android, Apple, Windows Phone, but also for Windows, Mac, Linux. On top of that you also get web applications. This enables you to use push notifications to look at important information from your Smart Home (window open, forgot to switch the light off …).
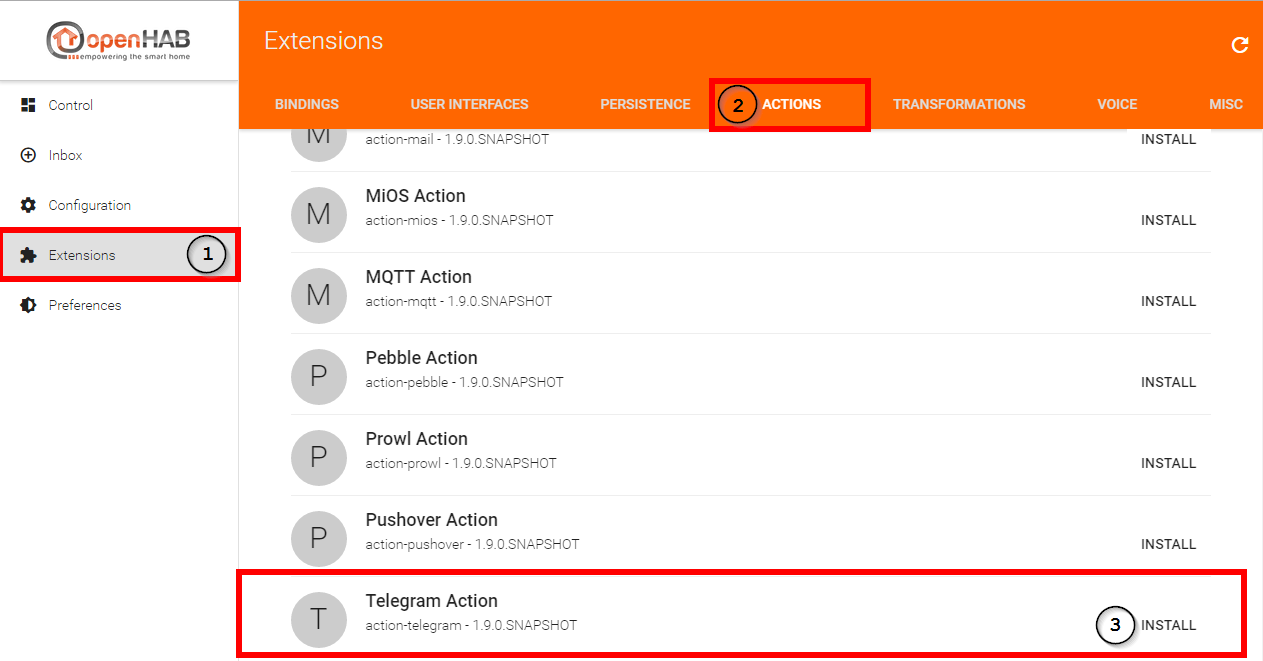
openHAB 2 Push Notifications – Install openHAB 2 Telegram Action
To start out call up your Paper UI and choose extensions from the menu. This time don’t choose the entry Bindings, but click on actions. You will find Telegram under “T”. Use the button ‘install’ to install the action. The binding/action is now activated.
You don’t have an openHAB 2 server? Read the post Smart Home – openHAB 2 Installation und Konfiguration. There you will find everything from hardware to installation. Furthermore you could enroll in my openHAB 2 Beginner Course.
openHAB 2 Push Notifications – Create Telegram Bot
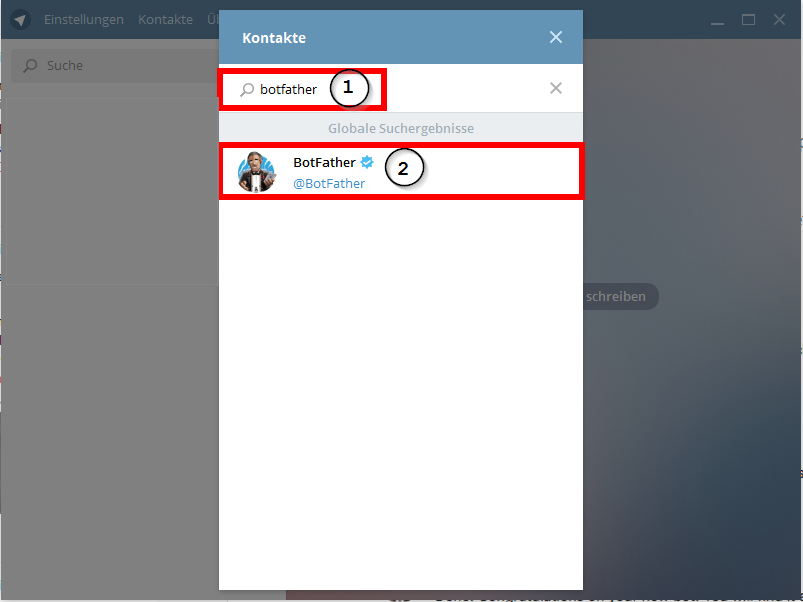
Following this you will have to create a bot you want to use for the notifications. First install the Telegram app and register directly with Telegram. The screenshots shown below are taken from Windows. The app should work similarly.
Start a chat with BotFather. To do this, search the contacts for BotFather. After choosing the contact, the chat window will open.
Now you have to enter the following commands into the chat one after the other: “/newbot”, the botname (I used “onesmarthome”) and the user (I used “onesmarthome_bot”). And that was all you had to do on Telegram. As a last step you receive the HTTP API token. It’s best to save that directly into a text document.

You can now run a test with your bot. Click the link telegram.me/YOURBOTNAME and start a chat.
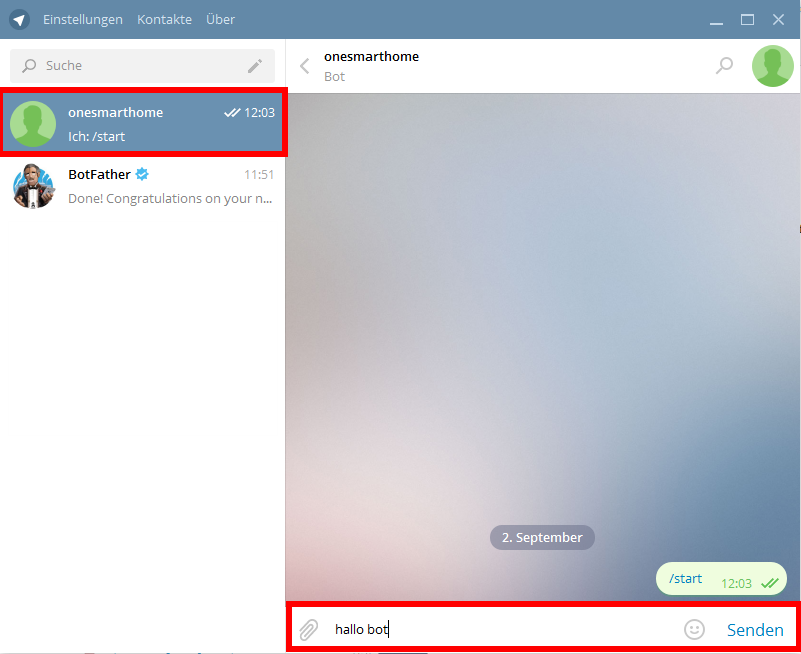
Following that, enter this address https://api.telegram.org/botAPI/getUpdates. Replace the red print API with your API from the chat with BotFather. If everything worked, you will now see the following information.

This gives you the confirmation that the message “hello bot” was received. Furthermore, it shows you the chat ID (blue frame). You will need this apart from the API for the configuration of the bindings.
openHAB 2 Push Notifications – configure openHAB Designer Telegram
Now enter the VS Code and configure the Telegram binding by opening the services folder and then telegram.cfg .
Remove the # in front of the command “bots=” and enter as many names of people as you want to send a message to. I’m really referring to names from actual persons. This is easier for me to understand, because it shows at a glance who will receive which info through Telegram via openHAB. That’s because you don’t need a bot for every user. The one bot you created is sufficient. All you have to do is contact the bot on the other devices. telegram.me/<bot_username> and start to receive the chat ID. For this you enter the same address as above https://api.telegram.org/botAPI/getUpdates. Now take a note of the chat IDs of the other persons. This way you can notify every person in your household through the bot.
Following this, again remove the # sign and create lines in accordance with the number of people with <botname>.chatID= and <botname>.token= . Enter a different chat IDs in the lines <botname>.chatID= . Enter the same token as above in the lines <botname>.token= .
# Bot Nachrichten
 bots=thomas,harry

# Thomas  Smartphone
thomas.chatId=25XXXXXXX
thomas.token=23XXXXXXX:XXXXXXXXXXXXXXXXXXXXXXXXXXSU

# Harrys Windows PC
harry.chatId=24XXXXXXX
harry.token=23XXXXXXX:XXXXXXXXXXXXXXXXXXXXXXXXXXSU
When this is done, find the *.rules file in your rules folder. This is where you have to enter the rule. You could set up simple rule to test your configuration. Here is one really simple example. If you are new to openHAB, you will need an Item and a Sitemap to test.
/* Telegram */

/* Test Message */
rule "Send message via Test Switch"
when
    Item Telegram_Switch received update ON
then
    sendTelegram("thomas", "Thomas, the switch is on!")
    sendTelegram("harry", "Harry, Telegram Switch has been switched on!")
end
This rule will make sure that both persons (Thomas and Harry) will receive a message when the switch has been switched on.
You may ask what I am doing with my Smart Home? I do stuff like inform about events like, that will help in all areas of you smart home.
Here are some examples where I get messages from my smart home.
Comfort
- when and which garbage is collected I get a small message
- I received a letter in my mailbox
Security
- smoke has been detected
- motion has been detected in specific cases
- I am away and a door/window is still open
- openHAB has been shut down
- send a picture from a surveillance cam
Energy Saving
- a water leak has been detected
- a window has been left open in Winter for more than 5 minutes
I believe the possibilities are clear and indefinite. When are you informed by your Smart Home? I am curious, leave a comment.
