Cloudless open source speech recognition with openHAB 2 and Snips.ai
Are you also suspicious of Amazon Alexa and Google Home? But you always wanted a local cloudless open source speech recognition? I did, because as you might know, I’m not happy with cloud services for speech recognition. Snips.ai now offers a chance to use a cloudless open source speech recognition based solely on a Raspberry Pi 3. I really like this concept because you’re able to configurate your assistant online while using it offline for cloudless open source speech recognition in your Smart Home. Improvements by other Smart Home users, for example, will improve your cloudless open source speech recognition, as well.
Cloudless open source speech recognition – necessary hardware
Even if you already own a Raspberry Pi with installed Smart Home Software, I advise to use a separate Rasperry for cloudless open source speech recognition. The reason is simple. If there’s a bug in one of the Rasperries, you will only have to reset one Pi. Your Smart Home with openHAB, FHEM, ioBroker or whatever they’re called is still up and running, while you only have to reset the Snips.ai Raspberry.
I suggest to use the following components:
Cloudless open source speech recognition – How to install Snips.ai on Raspberry Pi 3
- Download Rasbian Stretch Lite
- Unpack the ZIP file
- Install the image on a micro SD card with at least 4 GB, better 8 GB using Etcher.
- After the flash process create a file named “ssh” in your boot folder. This is important, because without it you won’t be able to access your Pi via SSH.
- Put your micro SD card in the Raspberry Pi 3
- Connect your Raspberry Pi with a LAN cable
- Connect your RPi3 with the power cable
- You are now able to log in directly to the Pi using Putty (in Windows). User pi, Passwort raspberry
- After logging in, enter sudo raspi-config
- Choose the first option and change the password
- Now choose the option Interface Options and activate the SSH server
NodeJs and NPM
As a basic requirement NPM and NodeJs is needed. Please enter the following commands step by step to install.
sudo apt-get update

sudo apt-get upgrade

curl -sL https://deb.nodesource.com/setup_10.x | sudo -E bash -

sudo apt-get install -y nodejs
Now check your installation with
node -v -
Version must at least equal Node v7.5.0.
npm -v
Install Snips via Sam Assistant Manager (SAM)
Installation is a lot easier with the Snips Assistant Manager (SAM) because it abbreviates long command chains. SAM is installed using the following command.
sudo npm install -g snips-sam
Connect SAM with your Raspberry Pi. If you have changed the host name, please make the same change in raspberrypi.local.
sam connect raspberrypi.local
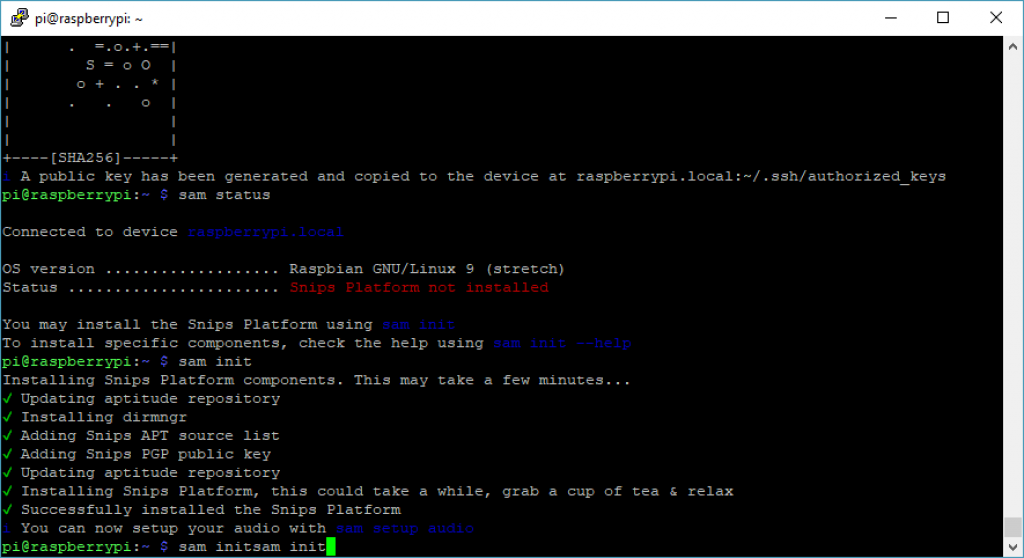
You are now able to check your status with the following command.
sam status
Install Snips with the following command.
sam init
Plug a speaker with a 3,5″ stereo jack into RPi. You may also use a headset. Go on to plug the PS3 eye camera into a USB Port. After that you may start the audio setup using the following command.
sam setup audio
Answer the question about the maker kit with “n”. The camera should be identified as CameraB409241 [USB Camera-B4.09.24.1], device 0: USB Audio [USB Audio] or something similar, if more than one device was found for the audio exit. Choose the entry without HDMI using the arrow keys on your keyboard.
Found 2 interfaces to output sound.
Choose the one you want to use as your speaker
❯ card 0: ALSA [bcm2835 ALSA], device 0: bcm2835 ALSA [bcm2835 ALSA]
card 0: ALSA [bcm2835 ALSA], device 1: bcm2835 ALSA [bcm2835 IEC958/HDMI]
You should now receive the following message:
Installed /etc/asound.conf
Setting to volume to 90% if possible
Restarting snips-audio-server service done
i You can test your microphone & speaker with sam test microphone / speaker
Test the speakers with the following command.
sam test speaker
You can interrupt the announcement using STRG + C.
Now test the microphone with the command:
sam test microphone
Wait a moment until the following line pops up:
Say something in the microphone, then press a key to continue...
Say something and press a key. The speaker should now repeat exactly what you said.
In case you wish to have audiofeedback, enter the following command.
sam sound-feedback on
Install Snips Assistant
In case you do not have a Snips account yet, get one at the following address.
https://console.snips.ai/signup
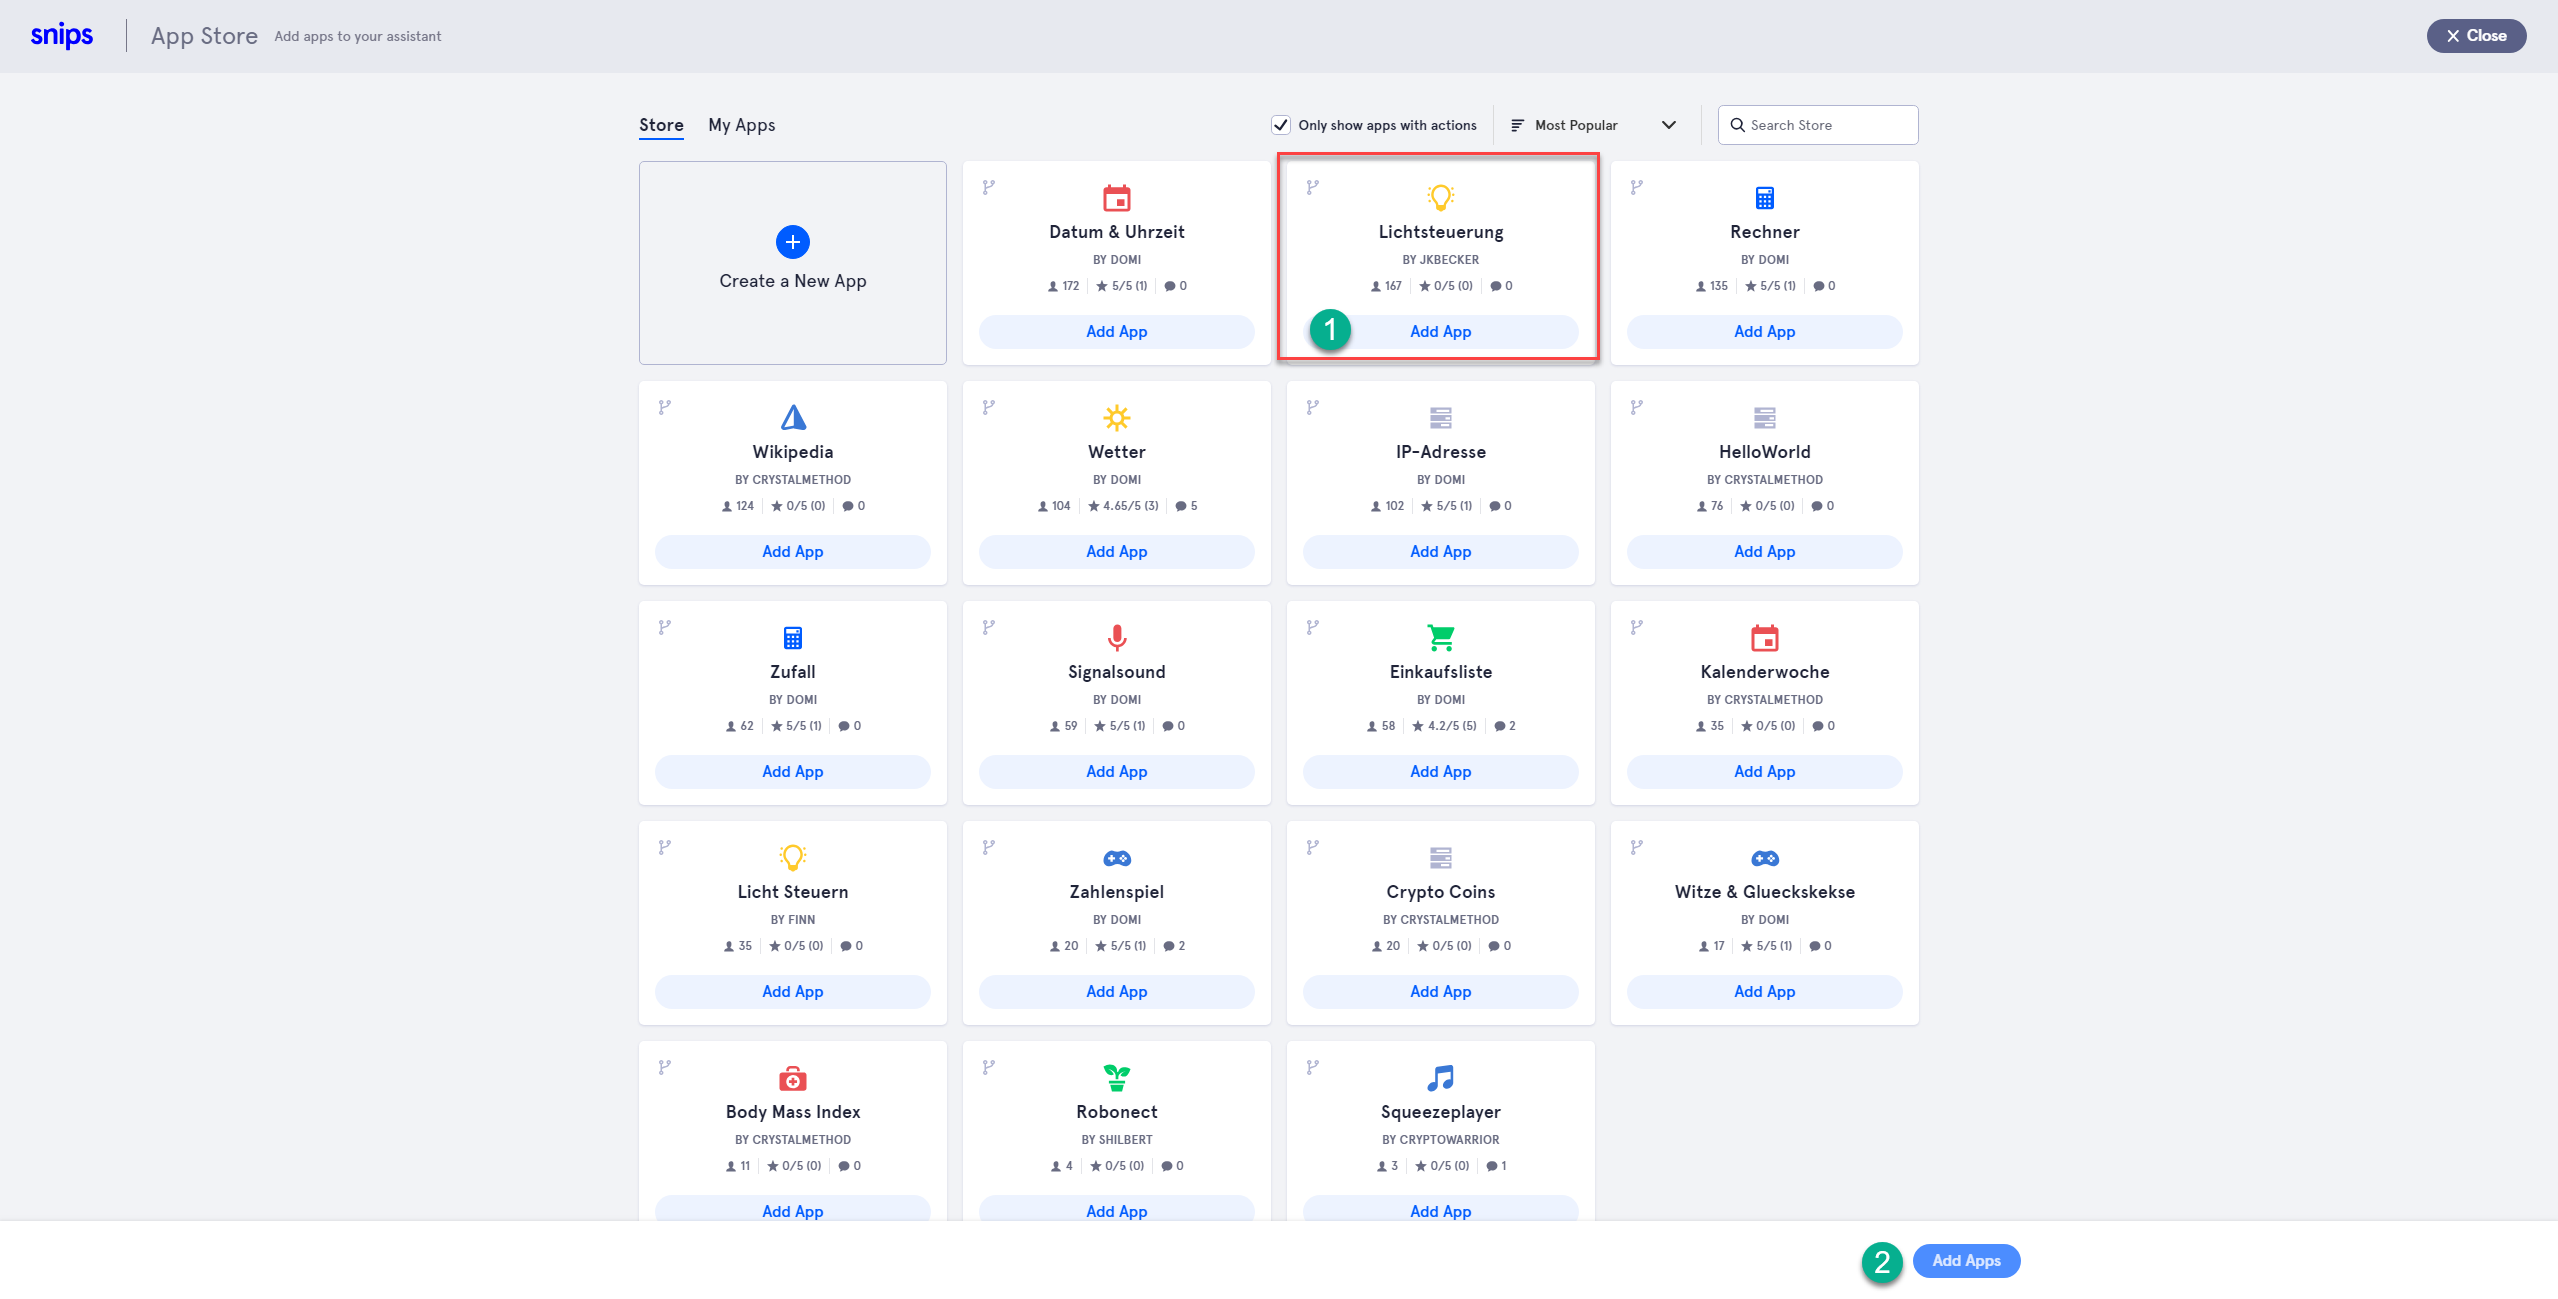
After that you may generate the first assistant and choose the app light control (1).
Now return to your SSH Client and enter the following command.
sam login
Enter your user name and password. After successful login enter the following command:
sam install assistant
In case you should already have several assistants, choose the one you want and it should start right away. It takes a while, especially the ASR training. But also the successive installation of the packages will take a bit longer. Once everything has run through, you should see the following results.
Fetching assistants done
Found 1 assistant named Wetter
Downloading assistant
Fetching assistants done
NLU training done
ASR training done
✔ Deploying assistant to raspberrypi.local...
Checking for skills
No python or Home Assistant snippets found
✔ Installing pip package and virtualenv. This could take a while.
✔ Installing git package
Cloning skill Wetter from url: https://github.com/MrJohnZoidberg/Snips-Wetter
Cloning into 'Snips-Wetter'...

Generating actions based on the snippets provided
INFO:snips_actions_templates_engine_lib: parsing snippets for skill "/usr/share/snips/assistant/snippets/domi.Wetter"

Checking actions for end-user parameters
✔ Generating virtual environment for python actions
Relaunching snips-skill-server
✔ Snips assistant is now running. Say hey_snips to start!
i Run sam watch to see the logs
After this, you can start the speech recognition with “Hey Snips, switch on the light in the bathroom”. If you want to watch what is happening in Snips, use the following command.
sam watch
The result is a JSONPath string:
{
  "input": "switch on the light in the bathroom",
  "intent": {
    "intentName": "udemy:switchonlights",
    "probability": 0.8252422
  },
  "slots": [
    {
      "rawValue": "bathroom",
      "value": {
        "kind": "Custom",
        "value": "bathroom"
      },
      "range": {
        "start": 14,
        "end": 17
      },
      "entity": "objectLocation",
      "slotName": "deviceLocation"
    }
  ]
}
To access these data in your Smart Home, you now need a platform which is able to connect to the Snips Raspberry Pi via MQTT. How I do that with openHAB 2, you will read in the following chapter.
Connect cloudless open source speech recognition – Snips with openHAB 2
Of course you need a system for the cloudless open source speech recognition, which will receive the contents of the MQTT Topic from Snips and take over control. For this you can use openHAB 2 or Home Assistant like I do. I’m sure it will also work with systems like FHEM or ioBroker. As long as you have the means to enter MQTT into your system and to split a JSON path string, nothing can stop you from using cloudless open source speech recognition.
Connect Snips to openHAB 2 – install MQTT binding and create item
Install the MQTT binding using Paper UI and enter the following in mqtt.cfg. You need to replace ‘hostname’ with your host name.
snipsmqtt.url=tcp://hostname:1883
snipsmqtt.clientId=oh2
Now create an items file named snips.items.
String Snips_Intent "Snips Intent" { mqtt="<[snipsmqtt:hermes/intent/#:state:default]" }Connect Snips to openHAB 2 – process Snips MQTT topic by rule
To be able to process the various voice prompts in your Smart Home server, you need to receive the topic with each change. This is how it works with openHAB 2. The contents are still shown in the logviewer. It makes sense to use this to analyse the logic.
rule "Snips"
when
  Item Snips_Intent received update
then
  logInfo("Snips Intent: ", Snips_Intent.state.toString)
end
Connect Snips to openHAB 2 – Split MQTT topic using JSONPath transformation
Finally, install the JSON Path transformation via Paper UI. You can now extend this rule to split the contents of the MQTT topic.
This is what the following rule does:
- The intent is split up, so that the name of the intent is listed in pureIntent without the user name. For our app as shown above the following commands are listed in this variable: switchofflights, switchonlights, dimlights etc.
- In the variable device_val we transmit the data from the first slot. In our example it’s the bathroom.
- Using the intent name we are defining the condition by using a global variable oh2ONOFF. ON or OFF
- In a last step we request the previously retrieved data from the variable device_val. If it says bathroom, we switch the relevant item on or off with the global variable.
var String oh2ONOFF

rule "Snips"
when
    Item Snips_Intent received update
then

logInfo("Snips Intent: ", Snips_Intent.state.toString)

var String intentName = transform("JSONPATH", "$.intent.intentName", Snips_Intent.state.toString)
var String pureIntent = intentName.split(":").get(1);
var String device_val = transform("JSONPATH", "$.slots[0].value.value", Snips_Intent.state.toString)

logInfo("Snips Device: ", device_val)

pureIntent = pureIntent.toLowerCase

logInfo("Snips device value: ", pureIntent)

if (pureIntent == 'switchonlights') {
  oh2ONOFF = "ON"
} else if (pureIntent == 'switchofflights') {
  oh2ONOFF = "OFF"
}

if (device_val == 'bathroom') {
  sendCommand(Light_Toilette,oh2ONOFF)
}
 logInfo("Snips device value: ", device_val)
end
Cloudless open source speech recognition – Online course to get started with openHAB 2
If you are not that familiar with openHAB 2. I suggest you enroll in my online training Smart Home Fundamentals – Build your own secure Smart Home with openHAB 2.
This a 49% discounted limited offer. If the coupons are all used you will have to pay 59$ or use our payment plan. This will save you a lot of time reading trough docs and communities. Check our preview videos in the curriculum. If you are not happy, please contact us and we will find a solution.
Of course you may also work your way through the opening posts openHAB 2 Installation and openHAB 2 Configuration. You can ask any questions you may have right here on the blog using the comments.
Now I wish you a lot of fun with your cloudless open source speech recognition!
