Smart Home – openHAB 2 Raspberry Pi Installation
This post is all about the openHAB 2 Raspberry Pi Installation. I will tell you how to assemble the Raspberry Pi Starter Set and how to install openHABian. If you only would like to test openHAB 2 first of all, I recommend to do it on a Windows PC. You should read the post Smart Home – openHAB 2 Installation und Configuration.
Smart Home – openHAB 2 Raspberry Pi
openHAB 2 Raspberry Pi – Starter Set
I would suggest a Raspberry Pi – Starter Set for the Installation of openHAB 2. You will get all the components needed and can start right away.
I would recommend the following Raspberry Pi – Starter Set:
openHAB 2 Raspberry Pi – Assembly
After you have received your Raspberry Pi Starter Kit, you will have to assemble the components. The case might differ from your version, but the assembly should be very similar. Do not use any pressure. Everything should fit easily.
Open the case and carefully take pull out the Raspberry Pi from the anti-static foil.
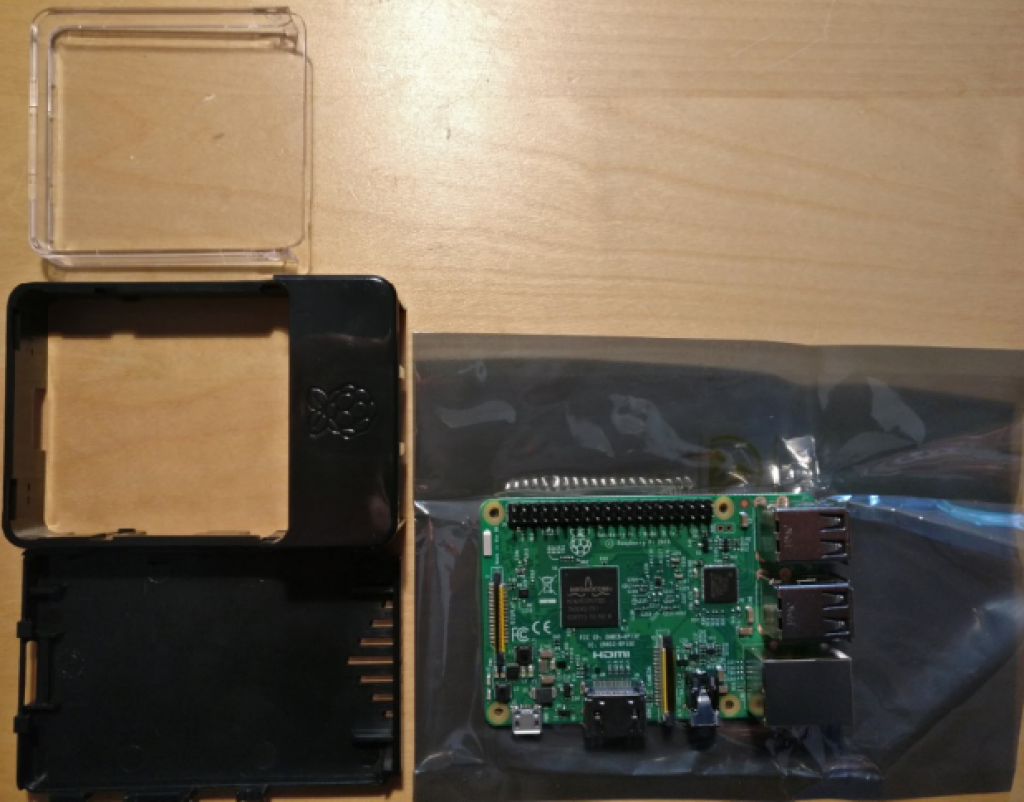
Carefully put the Raspberry Pi Board into the lower part of the case.

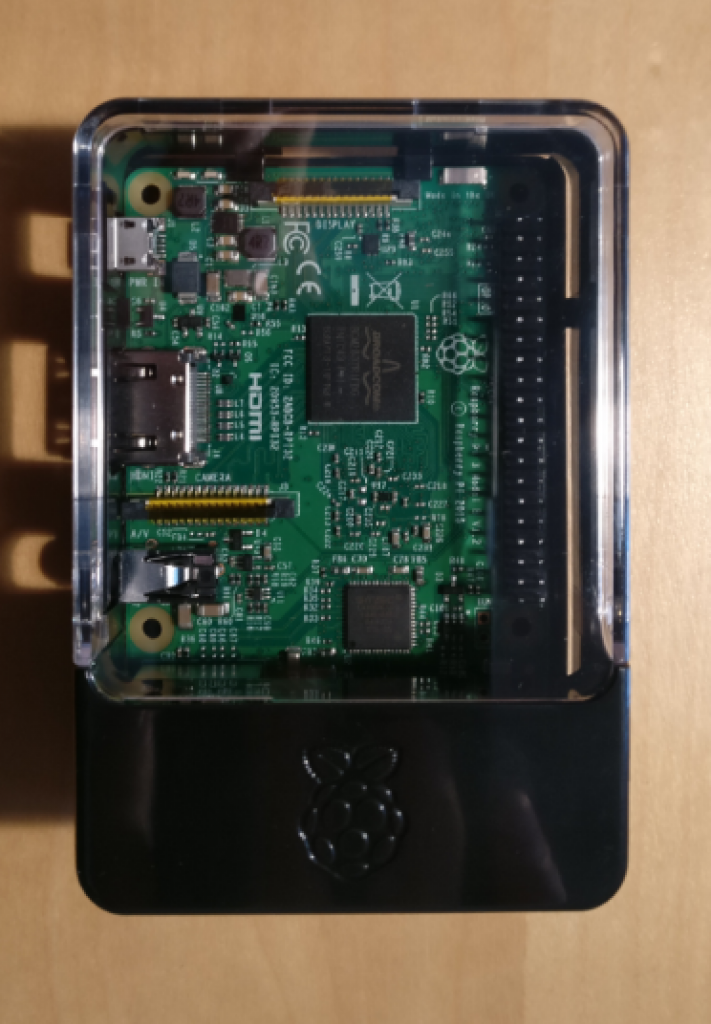
Put the top off the case on the lower part.
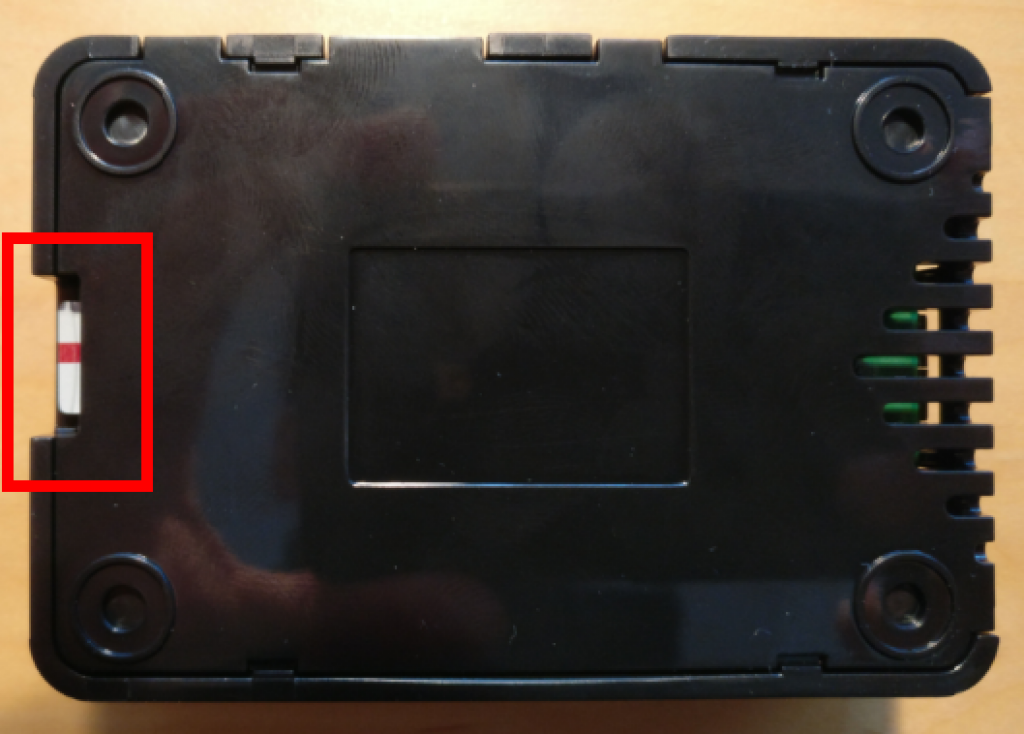
If you search for the SD card slot later on, it is on the lower part of the board. But do not put the card in right now, we will have to flash it first. Please scroll down a bit and read the flashing chapter “openHAB 2 Raspberry Pi – openHABian – Flash SD Card” now. After flashing put in the card and continue reading here.
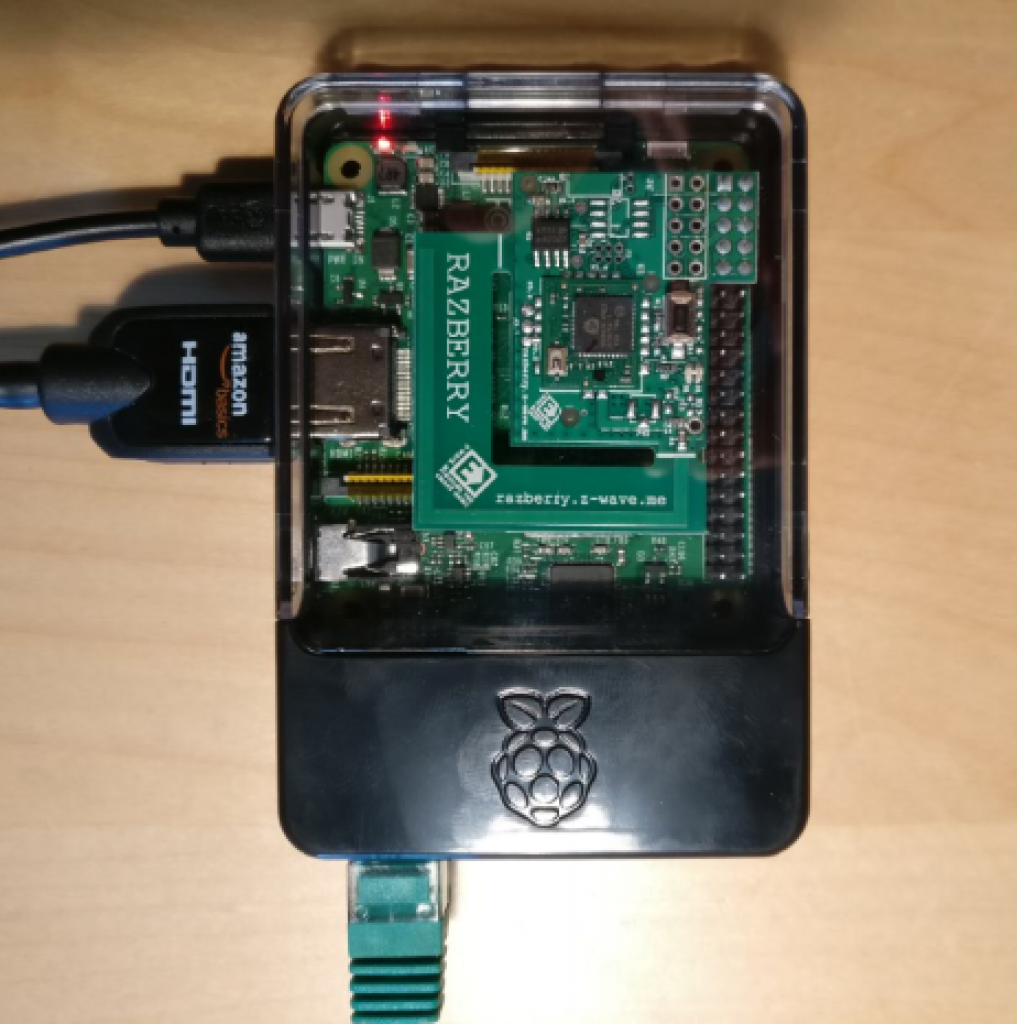
Did you read the flashing chapter and is your SD card flashed with the openHABian image? Now you have may connect the different cables. If you would like to see what is going on, attach the HDMI cable. Connect the network cable and at least connect the micro USB with your power supply.
If you would like to use the Raspberry Pi directly, you may connect your USB mice and keyboard. But it is not needed. You may connect to your Raspberry Pi with Putty. And that is recommended, because you would not like to go your Raspberry Pi every-time you need to change something.
Smart Home – openHAB 2 Raspberry Pi – openHABian
openHABian is an easy way to get your basic installation of openHAB. We all have to thank Thomas Dietrich, who has made life so much easier for all Smart Home enthusiasts.
So get the latest Release of openHABian.
openHAB 2 Raspberry Pi – openHABian – Flash SD Card
To create your openHABian SD card, you should download Etcher. Get the version for your operating system. Put in the SD card in your SD card reader and start Etcher.
Select the Image (1).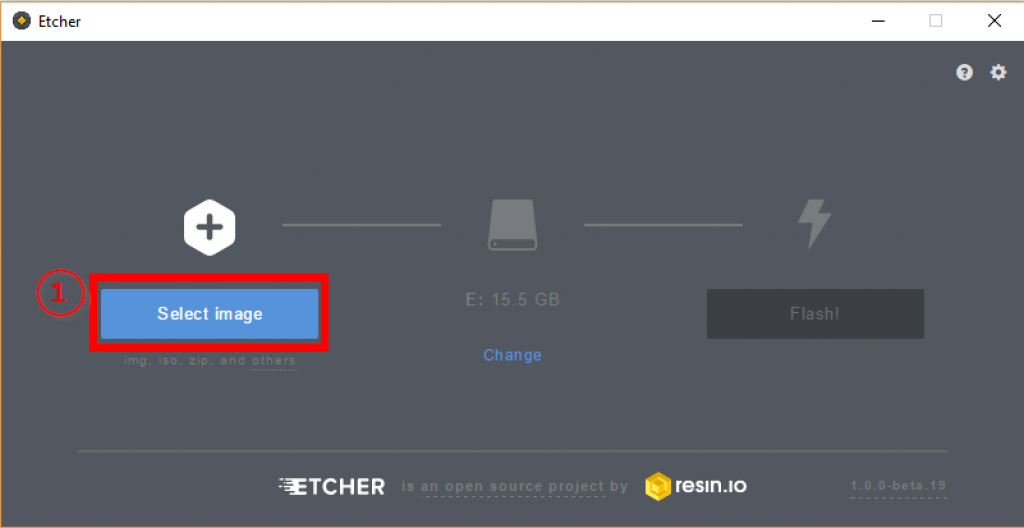
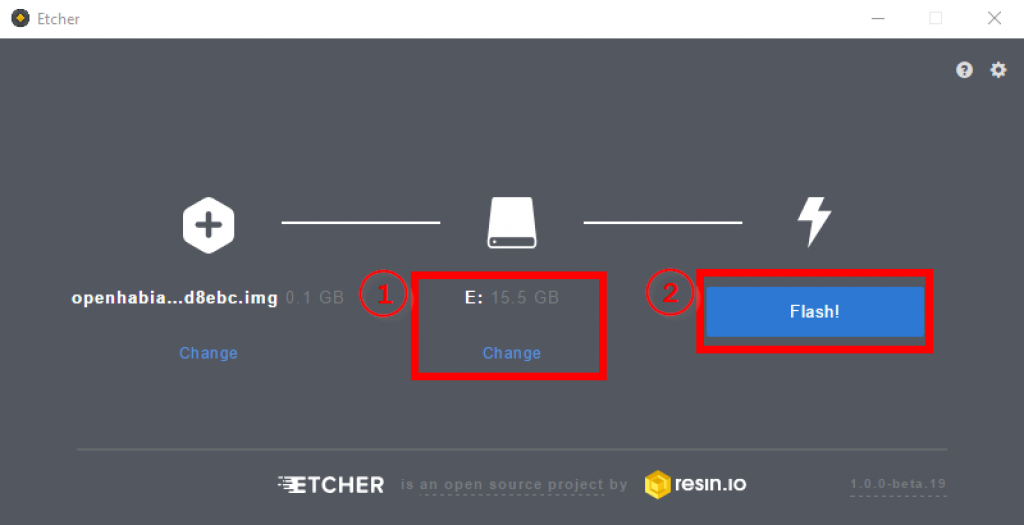
Typically your SD card should be recognized if you only have own card in your reader.
Sure you have the correct card (1)? Than hit Flash! (2)
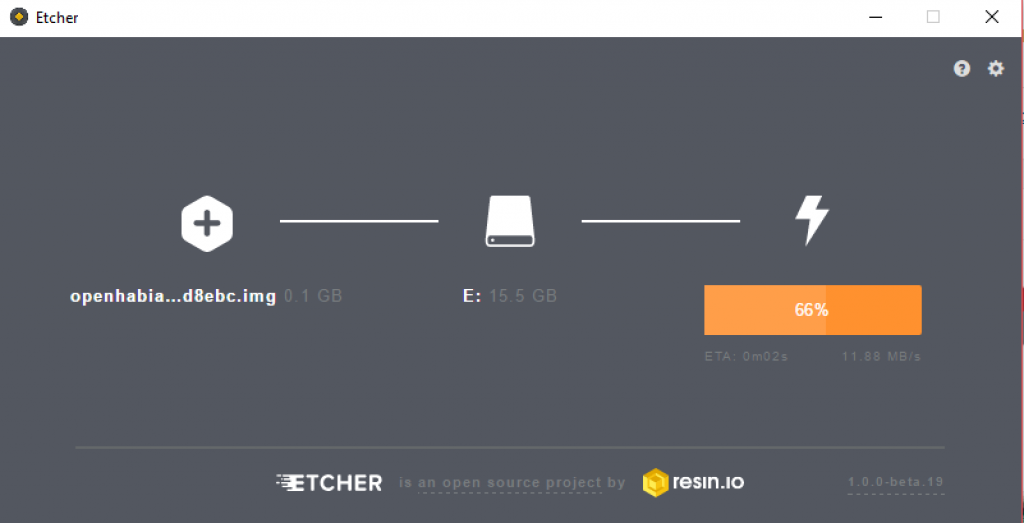
Etcher needs a bit. You will see a progress bar.
If the flash process has been executed without errors, you will get a success message.
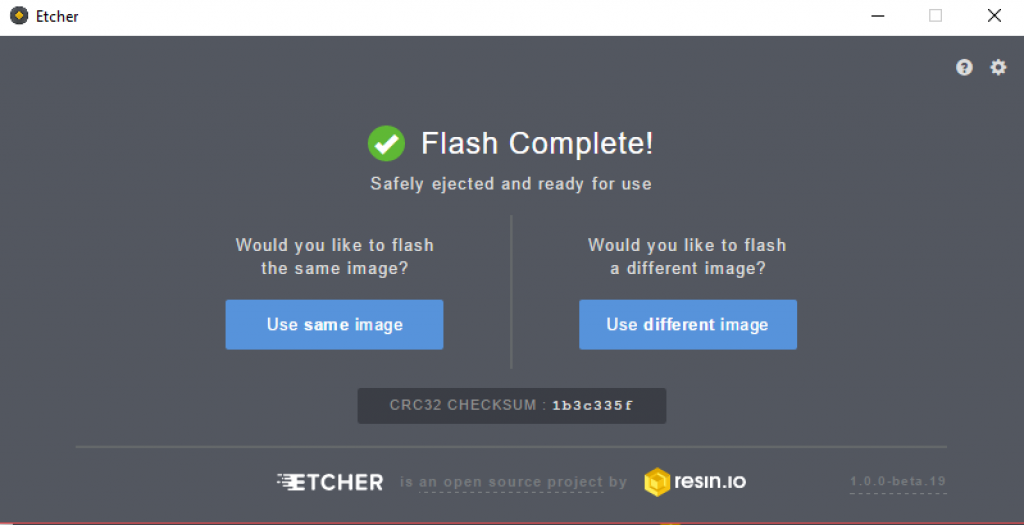
You may compare the checksum, to ensure you flashed the correct version.
openHAB 2 Raspberry Pi – openHABian – First Start and Configuration
Now take your assembled Raspberry Pi and put in the SD Card and connect your network and power cable. The Raspberry Pi will work through the installation procedure of openHABian. This will take between 5 and 60 minutes, depending on the performance of your hardware. You might already follow the procedure by connecting to your Raspberry Pi using SSH. The access might be done by using Putty.
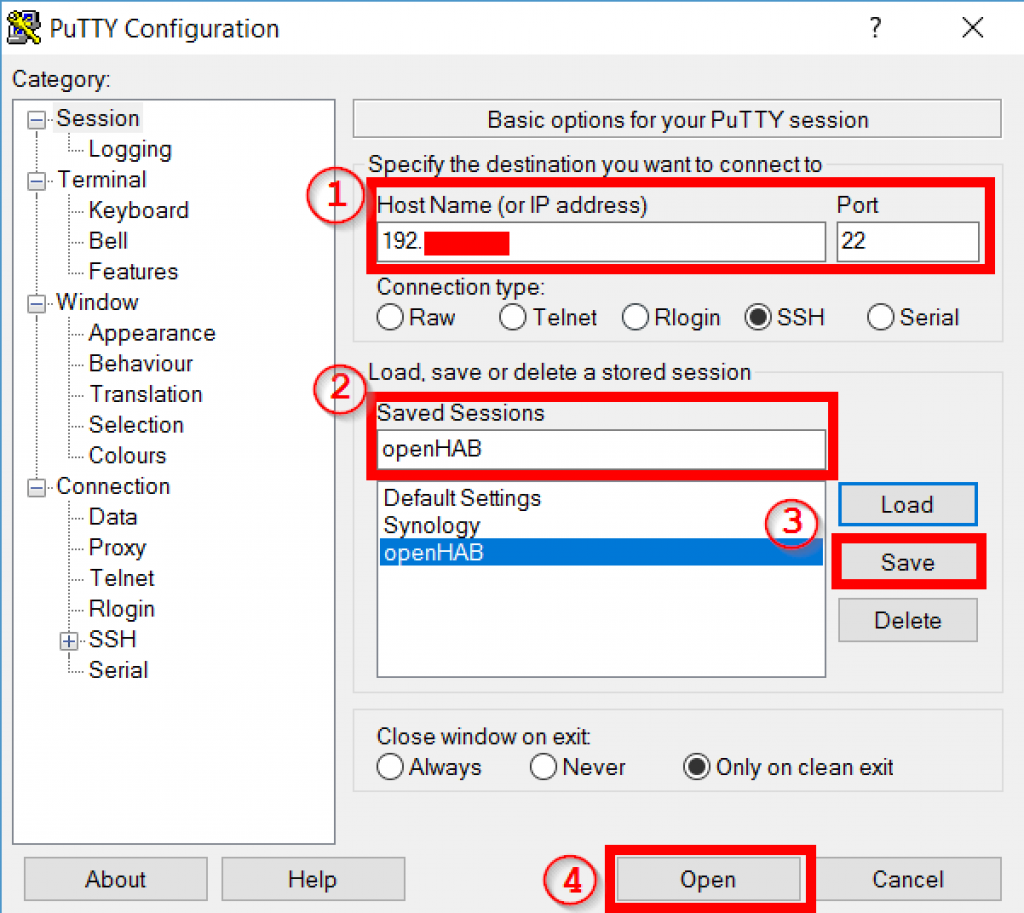
Put in openHABianpi or (if you have problems) the IP address of your Pi (1). The port will be 22. Choose a name for the connection (2) and save (3). Now you simply click on open (4). The first connection will be done with the user openhabian and password openhabian. You should change it be using the command passwd as soon as you are connected. You might also want to change the Samba password with the command “sudo smbpasswd openhabian”
To use openHABian and connect the Smart Home Designer, you should process the following steps:
Put in the following command.
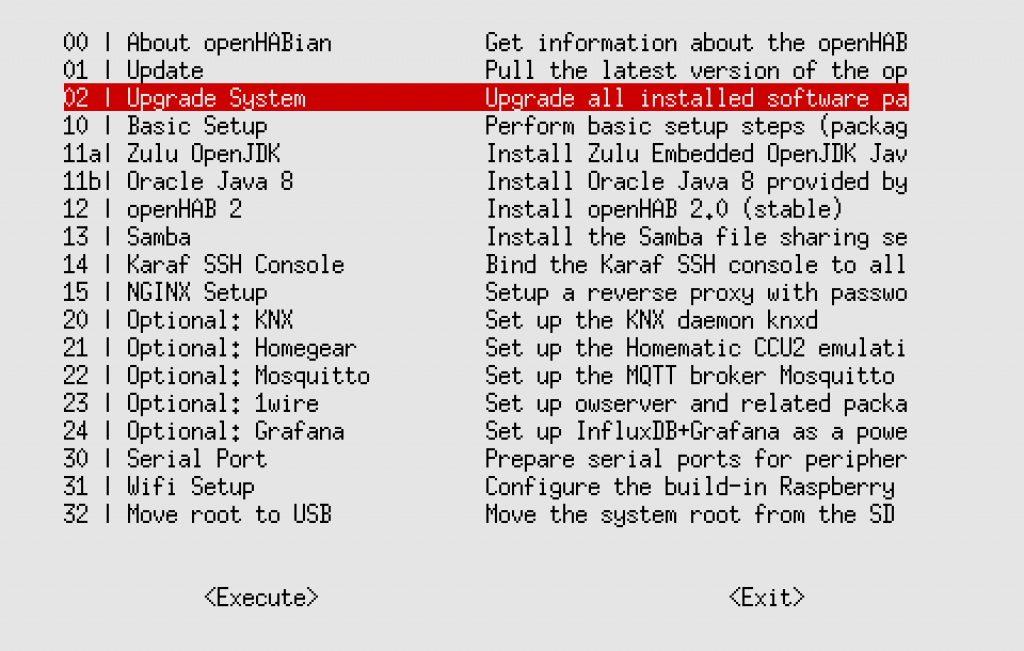
sudo openhabian-config
The openHABian config tool will open. openHABian will do an update at the beginning, but you should update from time to time. You will get improvements that are developed by Thomas Dietrich.
To do this, you will choose Update (01)

Next step will be upgrading the system(02).
If you would like more information about the other features, please check the official documentation. I suggest to visit the site from time to time, because you will get the latest infos from here. informieren. For example there is a openHAB Log Viewer, that will help you to identify problems in your smart home environment. To view the log, put in the following address in your browser.
http://openhabianpi:9001/
openHAB 2 Raspberry Pi – openHABian – Smart Home Designer
I already mentioned it, that you should always use the Smart Home Designer to configure your items. The reason is simple. You will see syntax errors right away. To get it working you have to connect a network drive. If you are working with a Windows PC, open the explorer and put in the following.
\\<IP_RASPBERRY_PI>
e.g.
\\openhabianpi
or
\\192.168.2.222
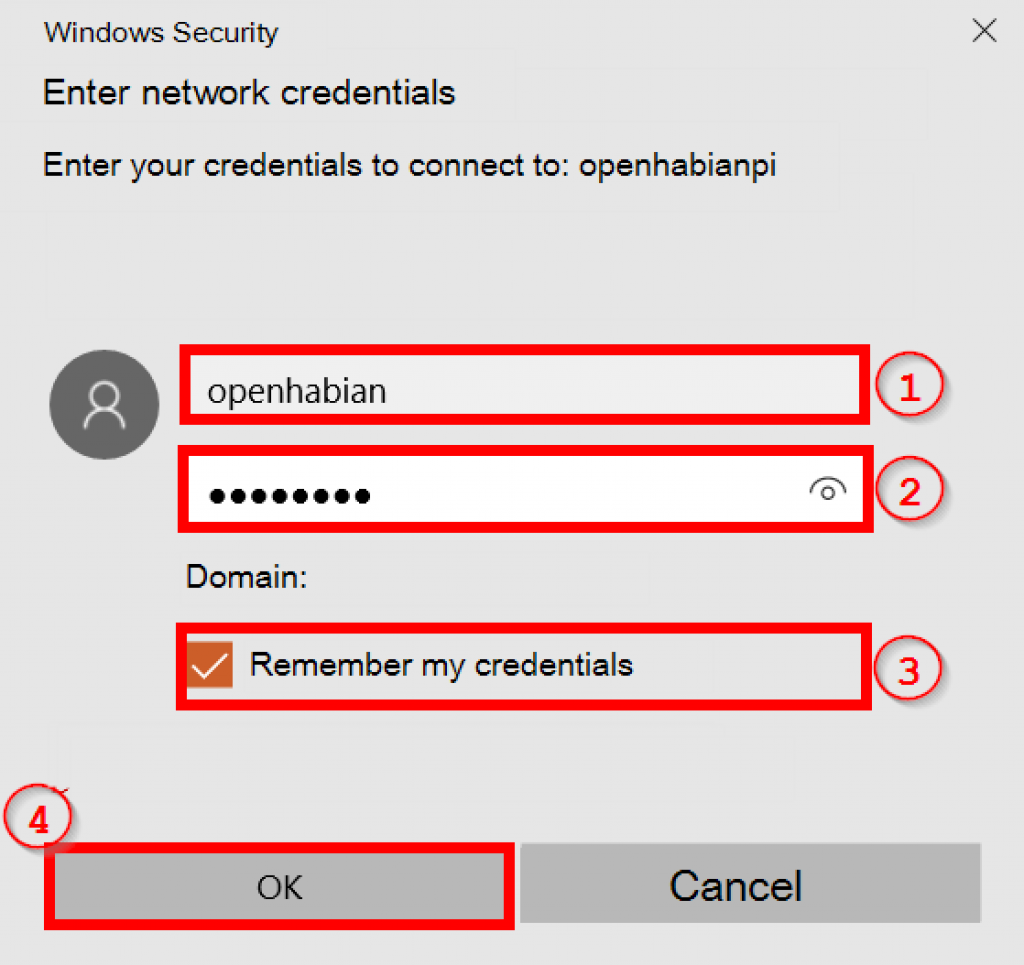
If you did not change your Samba, you are able to connect with user openhabian (1) and password openhabian (2). Click “Remember my credentials” (3) and hit OK (4).
Next do a right click on your openHAB-conf folder and choose “Map network drive”. Choose a letter for the drive and your openHAB folder should already be connected. This drive will be picked as the conf directory in the Smart Home Designer. If you have any problems, leave a comment. If it is working, I am happy to drink a coffee =)