openHAB 2 Visual Studio Code Extension
In this post I would like to introduce you to the openHAB 2 Visual Studio Code Extension. Apart from the installation of the openHAB extension I will also point out the basic configuration. The reason is simple. The Eclipse Smart Home Designer, which I presented in my post openHAB 2 Configuration will not be updated anymore. However, if you are a beginner, you should read the post in any case because it explains the basics about the items. These will remain valid requirements for many automations as well as the visualization. Do you prefer audiovisual? Please book my latest openHAB 2 video training.
But now let’s get started …
openHAB 2 Visual Studio Code – Installation
openHAB 2 Visual Studio Code – VS Code
The installation of Visual Studio Code is quite simple. Download Visual Studio Code. Simply follow the installation routine. I don’t think pictures will be necessary for this.
openHAB 2 Visual Studio Code – openHAB Extension
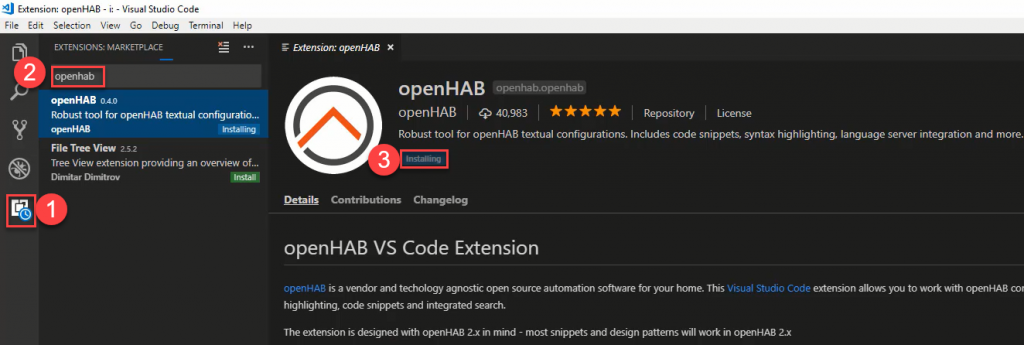
Following the installation, open VS Code and install the openHAB extension. You do this by clicking on the extensions (1), search for openHAB in the searchbar (2) and then install the openHAB extension (3).
openHAB 2 Visual Studio Code – openHAB Extension
The configuration is very similar as it is for the Eclipse Smart Home Designer, but there are some differences.
openHAB 2 Visual Studio Code – Configuration
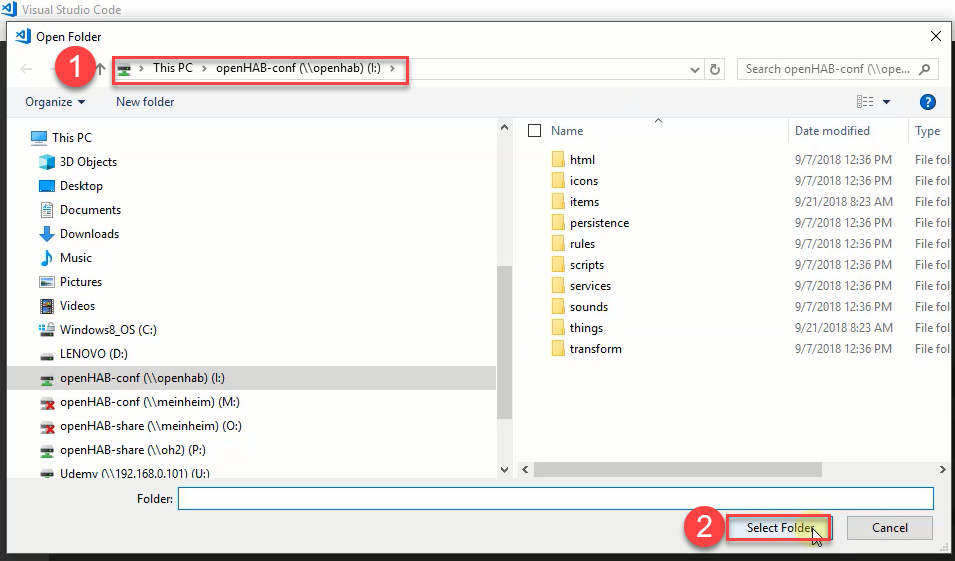
First choose the installation directory. For this, click the file menu (1) and then open folder (2). Or Simply hit CTRL + K + O.

As before, choose the folder Conf. This may either be the Samba Share directory of openHABian (preferably embedded as a network drive) or the Windows / Mac directory. Navigate to the folder (1) and click on select folder (2).
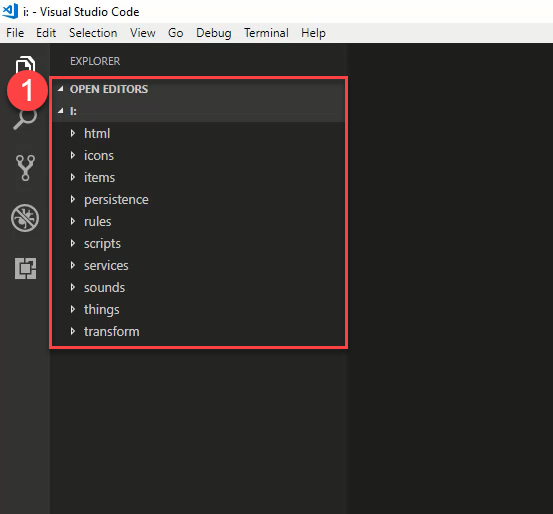
As usual, you will find the configurations folder of openHAB 2 on the left.
openHAB 2 Visual Studio Code – syntax check and host name setting
For Visual Studio Code to run a syntax check with the openHAB extension, the correct host name (name of the computer where openHAB 2 is installed) has to be set up. Furthermore, at least version openHAB 2.2.0 Build #1065 needs to be installed for a syntax check to run properly. Background is the use of the Language Server Protocol (LSP). This is only available from the above named version onward. There really isn’t anything to do with openHABian, unless you changed your host name or your port, for example. If that is the case, change the parameters so that VS Code is still able to bring faults to your attention. The following example gives you the necessary steps for the host name.
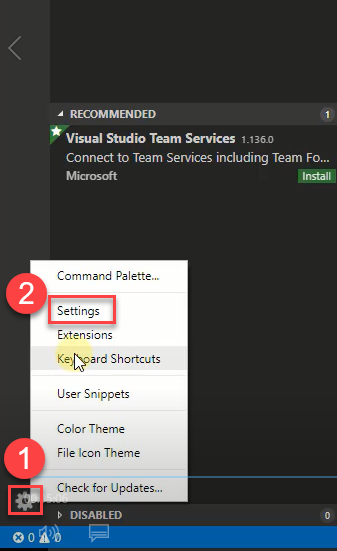
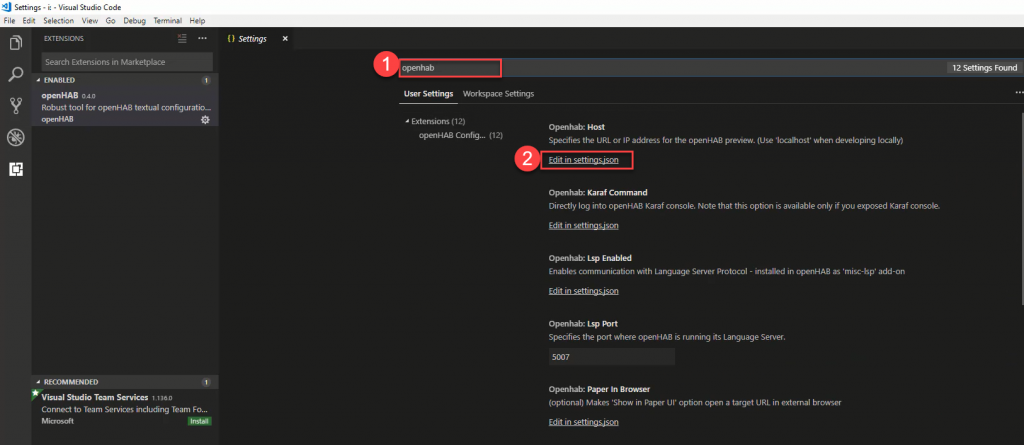
For this, open the settings using the gear at the bottom left (1) and select settings (2).
Now search for openHAB (1). Look up the entry OpenHAB: Host and click the link “Edit in settings.json” (2)
Now click on the pen next to the entry „openhab.host“: „openhabianpi“, (1) and choose „copy to settings“ If you are working on a local windows pc, enter „localhost“ as host name. If you use a disc station or a Raspberry, enter the relevant host name or IP. Now change the host name on the right side accordingly (2). In my case I replaced openhabianpi with openhab. Do not forget to save your settings by hitting CTRL + S.

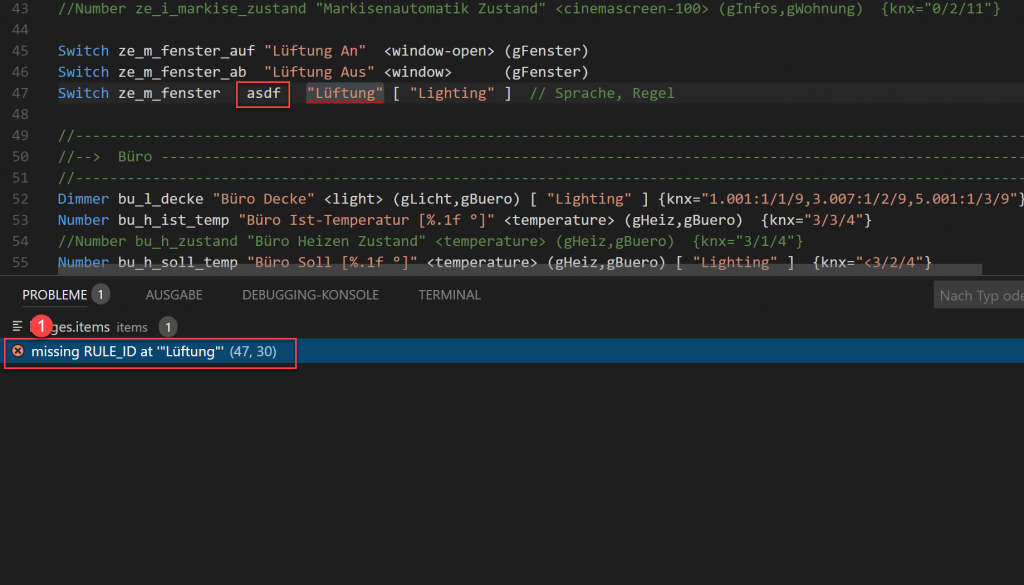
Syntax errors will be shown at the bottom with the tag „problems“. By clicking on the notice the editor will navigate to the respective line. In this example I have simply created an error.
openHAB 2 Visual Studio Code – Functions
Lastly, I will show you some ingenious functions you may use to make editing with VS Code a lot easier.
Visual Studio Code – Functions – Basic UI
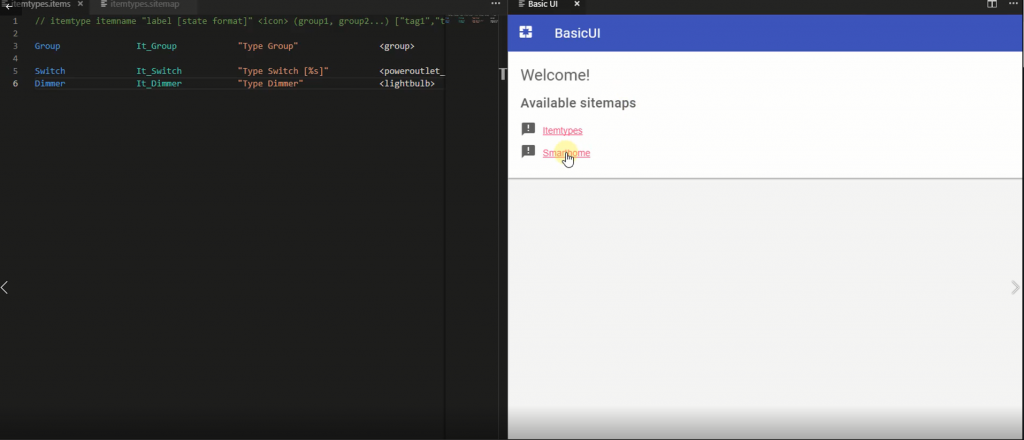
You can open the Basic UI directly by using the openHAB 2 symbol (1) at the right top or you hit the keys CTRL + ALT + O.

It will look like this.
Visual Studio Code – Functions – Paper UI
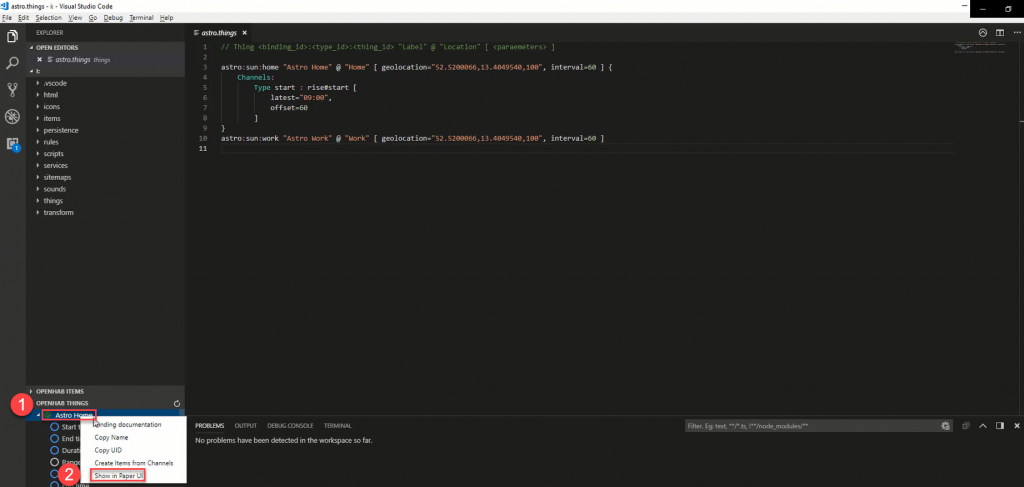
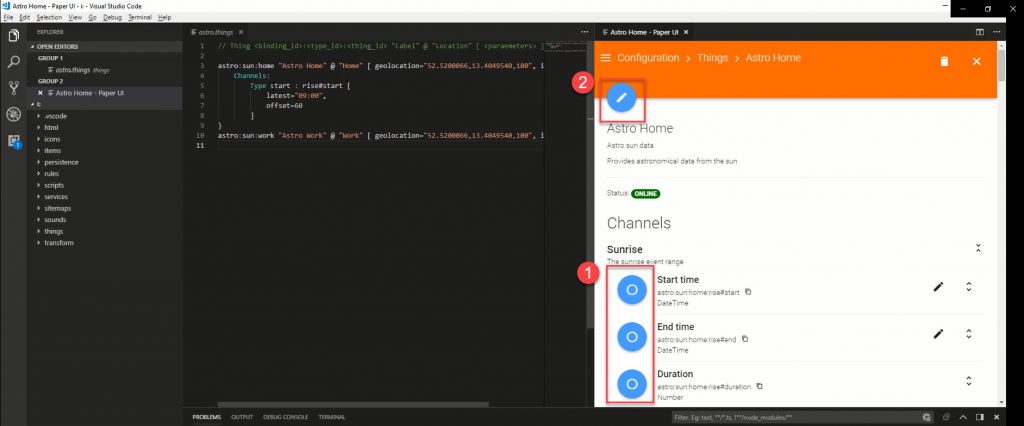
The Paper UI was also integrated directly. Simply click into the area Things (1) at the bottom left and then right click on the Thing you would like to edit. Now choose the entry „show in Paper UI“ (2) in the context menu.
You have now the option to connect channels (1) directly or to adapt names and location of things (2).
Visual Studio Code – Functions – Create Items from Thing Channel
You may now do such nice things as creating items directly from the things channels. Just enter the things area and choose „Create Items from Channels“ (1) in the context menu.
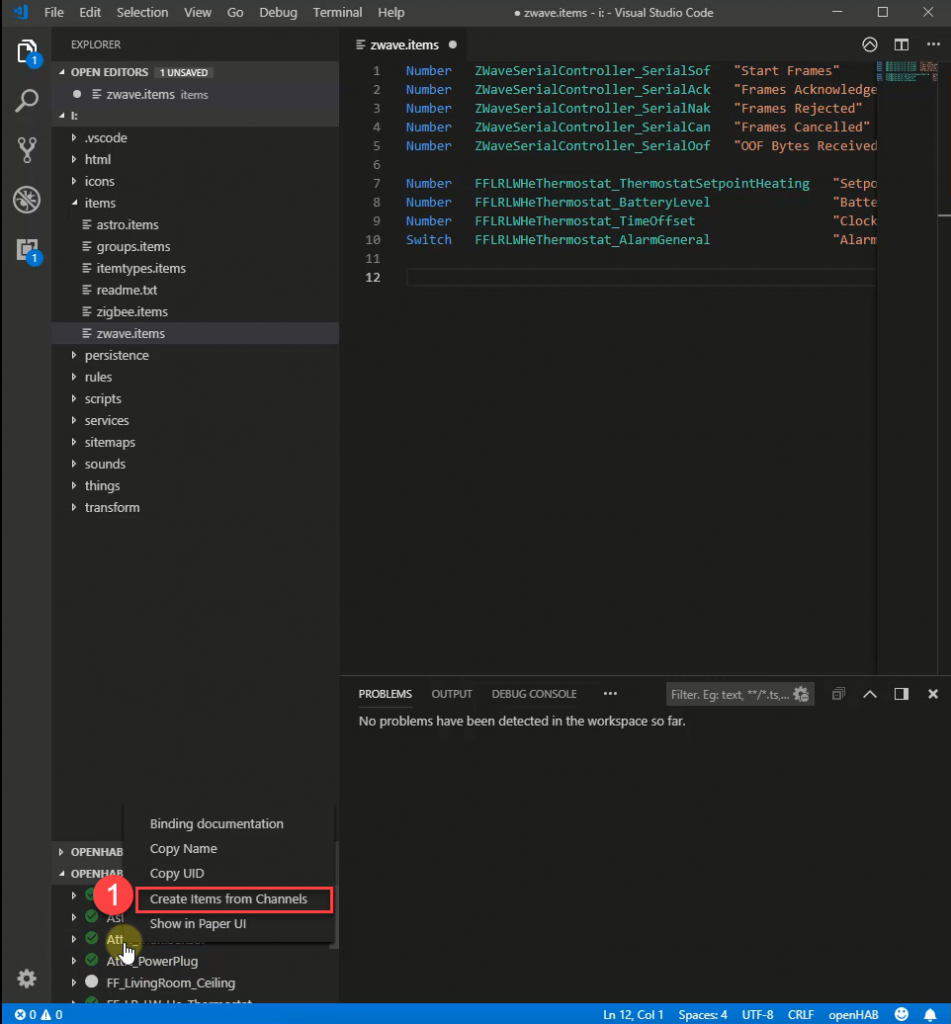
As a result, you have generated items for all channels. Simply awesome …
openHAB 2 Visual Studio Code – Conclusion
My conclusion? It’s fun. Really, it’s a lot of fun. VS Code with the openHAB extension is not only sexy, it is also a real relief. The old heavy weight Smart Home Designer can pack up now. I no longer need the fast editing with Notepad ++ and possible syntax faults, because I have only one editor! I’m really excited and if you would like some more impressions, you will get them in the openHAB 2 course. In case of need, look at the free lessons!
Leaves me to say thank you. Thank you @KubaWolanin!!!
openHAB 2 Visual Studio Code – Resources

